Barbie Pink Gel Nail Polish
Pink Nail

Barbie Pink Gel Nail Polish: A Fun and Fabulous Guide

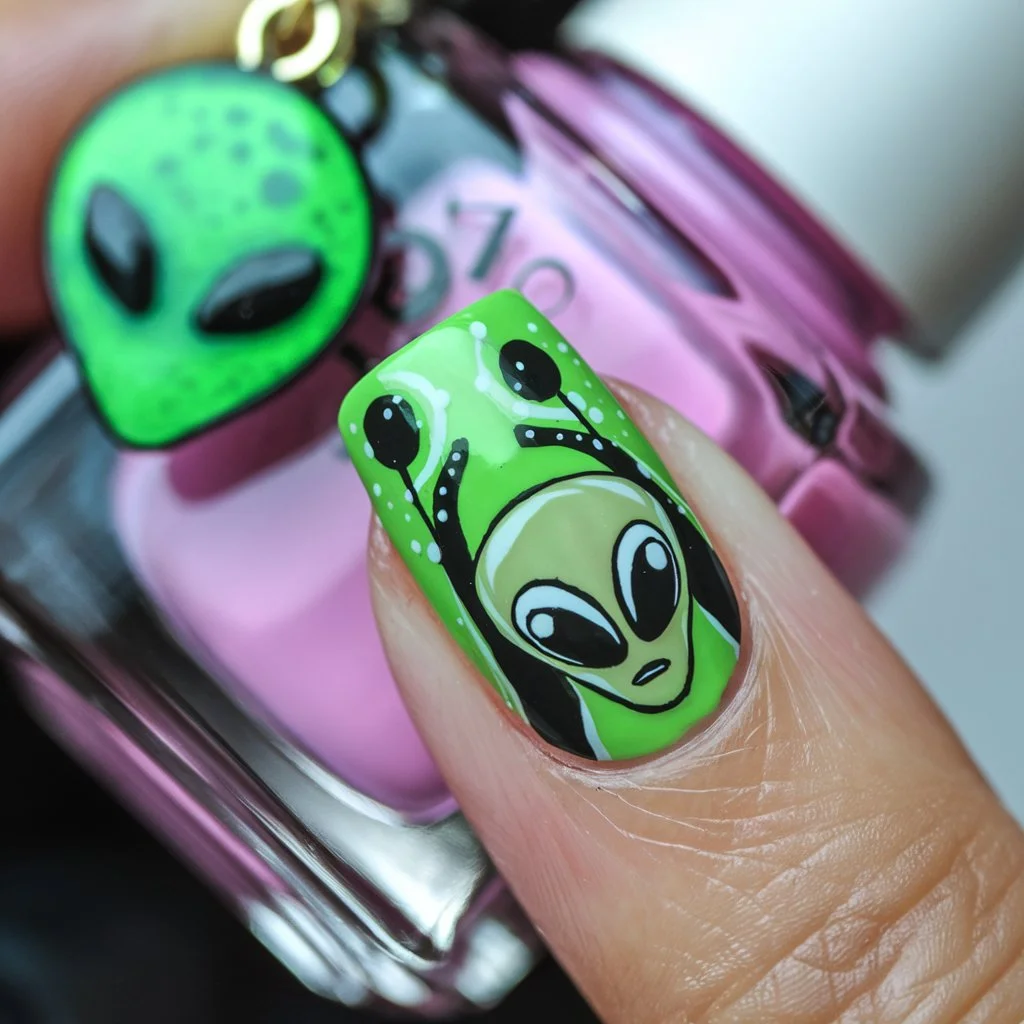
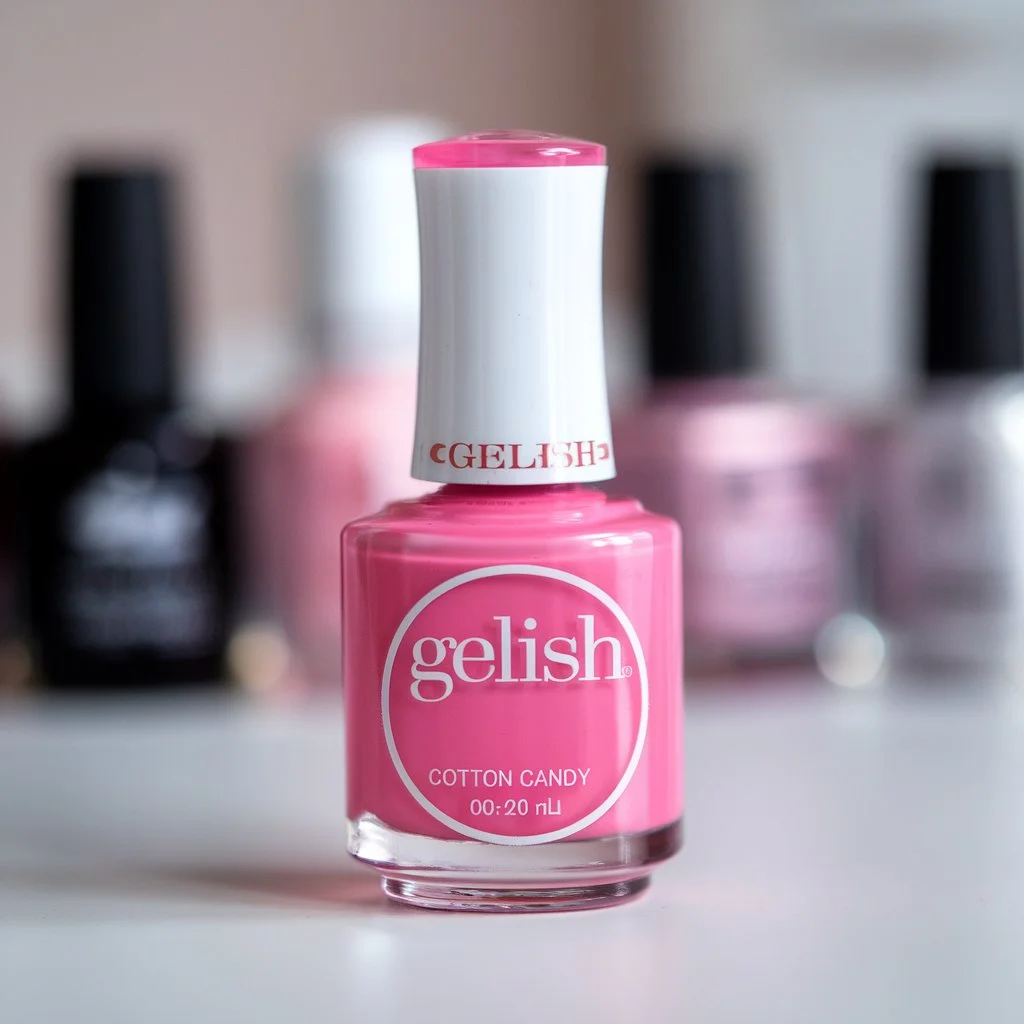
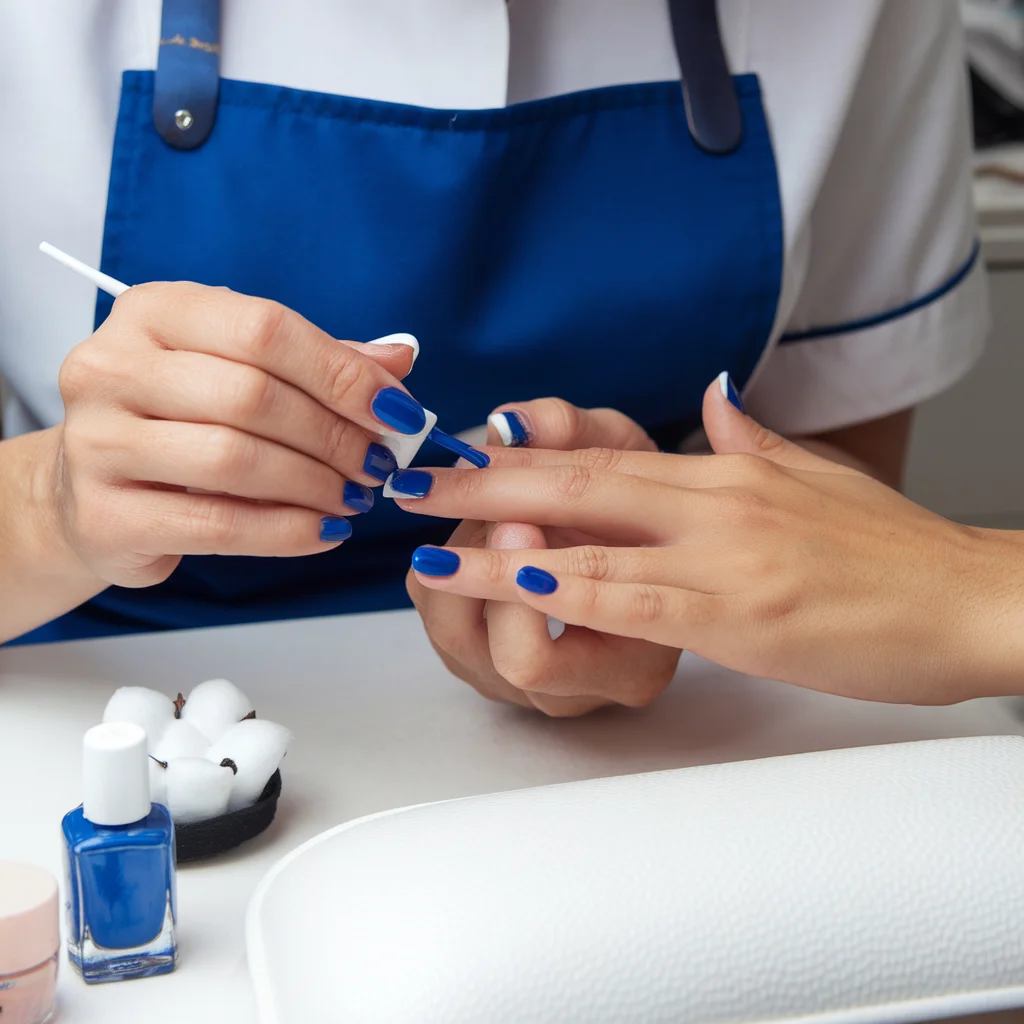
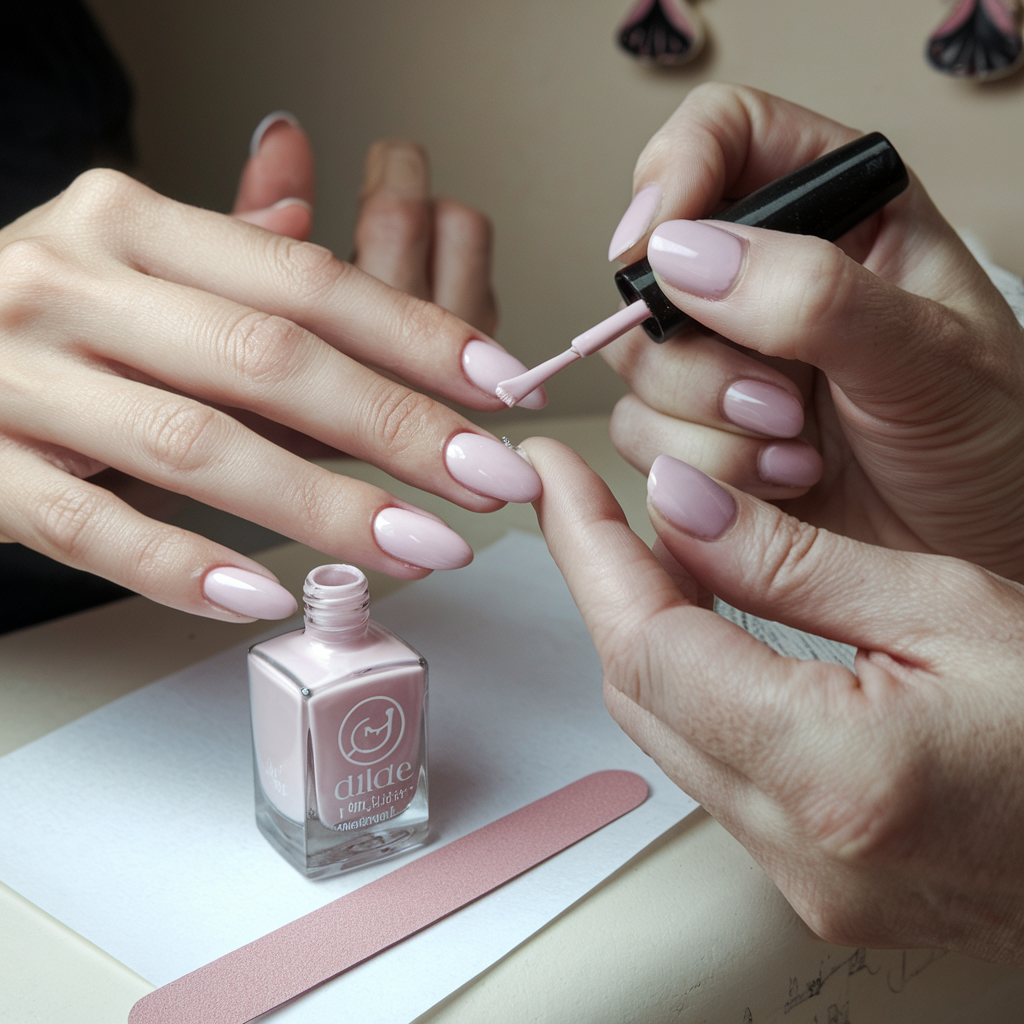
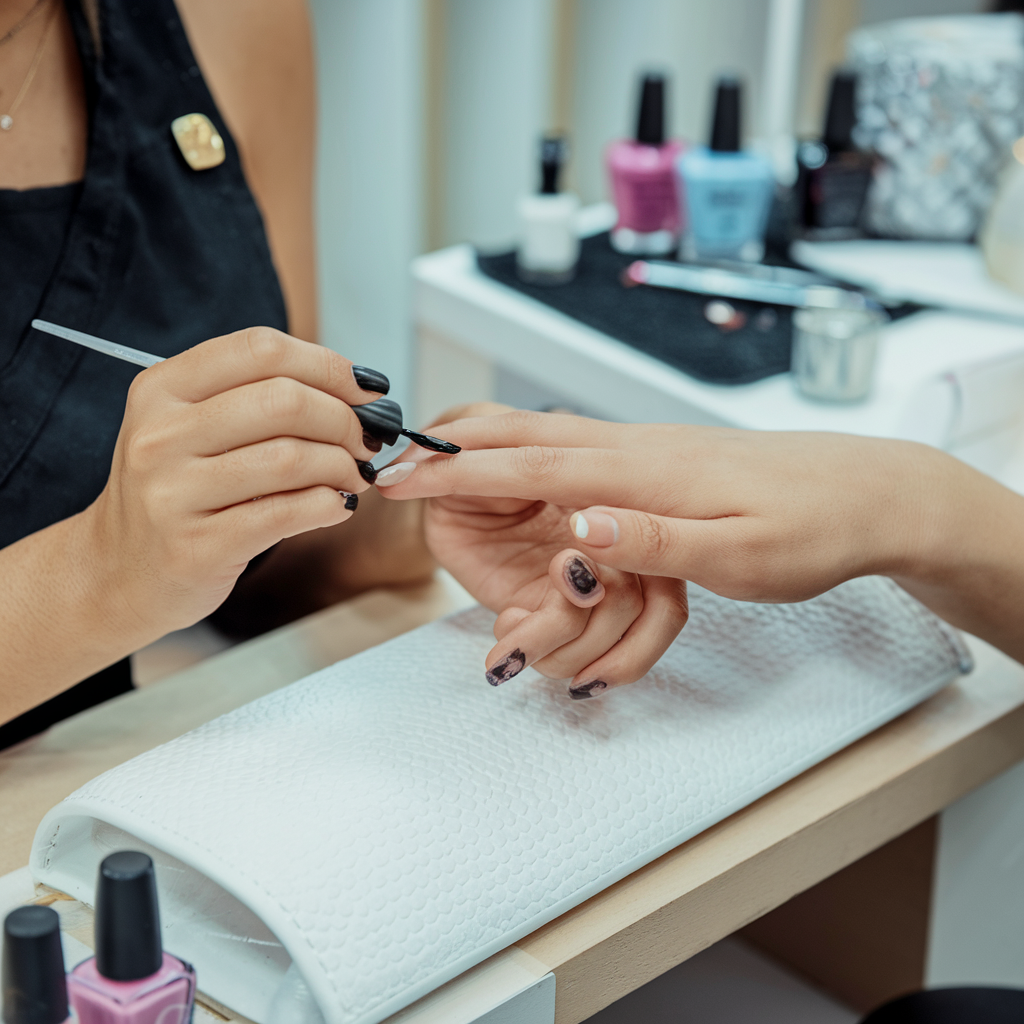
Introduction: Well, get ready to dive into the magical world of Barbie Pink Gel Nail Polish! This special nail polish is just like the ones you see on Barbie dolls—sparkly, bright, and oh-so-pink. It’s perfect for anyone who loves to have fun and wants their pink gel nail colors to shine like a star. In this guide, we’ll explore everything you need to know about glitter gel nails pink. From what makes it so special to how you can use it to make your nails look fabulous, we’ve got it all covered. Whether you’re new to nail polish or already a pro, this guide is for you. So, let’s get started and discover how you can make your nails look as amazing as pink beige nail polish!   What Is Barbie Pink Gel Nail Polish? Barbie Pink Gel Nail Polish is not just any ordinary nail polish. It’s a special type of nail polish that gives your nails a glossy and long-lasting finish. The color is inspired by Barbie, the famous doll known for her pink outfits and stylish looks. This nail polish is perfect for anyone who wants to add a touch of Barbie magic to their nails. Why Choose Gel Nail Polish? Gel nail polish is different from regular nail polish because it lasts longer and shines brighter. When you apply it, the polish stays on your nails without chipping for weeks. Plus, it gives your nails a smooth and shiny finish that looks just like the ones you see in nail salons. Isn’t that amazing? How Does It Work? The magic of gel nail polish lies in how it’s applied. First, you paint your nails with the gel polish. Then, you need to dry it under a special light called a UV or LED lamp. This light helps the polish harden and stick to your nails, making it last longer. The best part? It dries super fast, so you don’t have to wait around! The Perfect Barbie Pink Shade: Barbie Pink Gel Nail Polish comes in the most beautiful shade of pink. It’s bright, cheerful, and full of sparkle—just like Barbie herself. Whether you’re dressing up for a party or just want to add some fun to your everyday look, this pink polish is the perfect choice. How to Pick the Right Shade for You: Barbie Pink is a universal shade that looks great on everyone. But if you want to add a personal touch, you can choose a shade that matches your skin tone. Lighter skin tones look great with soft, pastel pinks, while deeper skin tones shine with brighter, bolder pinks. When to Wear Barbie Pink Gel Nail Polish: This pink gel nail colors is perfect for any occasion! You can wear it to a birthday party, a school event, or even just when you’re hanging out with friends. It’s a fun way to show off your style and let your personality shine through.   Applying Barbie Pink Gel Nail Polish: Ready to make your nails look fabulous? Here’s a step-by-step guide to applying glitter gel nails pink. Step 1: Prepare Your Nails Before you start painting, make sure your nails are clean and dry. You can use a nail file to shape them and a cuticle stick to push back your cuticles. This helps the polish go on smoothly. Step 2: Apply a Base Coat A base coat is like a protective layer for your nails. It helps the gel polish stick better and prevents your nails from getting stained. Apply a thin layer of base coat and let it dry. Step 3: Paint Your Nails Now it’s time to apply the Barbie Pink Gel Nail Polish! Start with a thin layer and paint each nail carefully. Once you’re done, dry your nails under the UV or LED lamp for about 30 seconds. Step 4: Add a Second Coat For a more vibrant color, apply a second coat of the gel polish. Again, dry your nails under the lamp for 30 seconds. This will make your nails look even more stunning! Step 5: Apply a Top Coat The top coat is the final step. It adds extra shine and helps your polish last even longer. After applying the top coat, dry your nails under the lamp for another 30 seconds. And just like that, your nails are ready to dazzle!   Barbie Pink Gel Nail Polish: Product Information Now that you know how to apply it, let’s take a closer look at the pink gel nail colors itself. This product is not only fun to use but also has some fantastic features that make it stand out.   Key Features: Feature Description Color Bright Barbie Pink with a glossy finish. Lasting Power Up to 3 weeks without chipping or fading. Drying Time Quick drying under UV/LED lamp in 30 seconds. Application Smooth and easy to apply, even for beginners. Safe Ingredients Made with non-toxic ingredients that are safe for kids. Removal Easy to remove with regular gel polish remover. Versatility Perfect for all occasions, from parties to everyday wear. Packaging Comes in a cute, Barbie-themed bottle that’s fun to display and use.   Caring for Your Barbie Pink Gel Nail Polish: Taking care of your nails is just as important as painting them. Here are some tips to keep your pink beige nail polish looking fresh and fabulous. Keep Your Nails Moisturized: Just like your skin, your nails need moisture too! After applying the gel polish, make sure to use hand cream or cuticle oil regularly. This helps keep your nails and cuticles healthy and prevents them from drying out. Avoid Harsh Chemicals: Try to avoid using harsh chemicals like cleaning products on your nails. If you need to clean, wear gloves to protect your nails. This will help your gel polish last even longer. How to Touch Up Your Nails: If you notice any chips or scratches on your nails, don’t worry! You can easily touch them up by applying a small

Ferrari Red Nail Polish
Nail Polish

Ferrari Red Nail Polish: A Fun and Stylish Guide for Kids!

Introduction Ferrari Red nail polish is all about glam and fun! Imagine having bright, bold nails that catch everyone’s eyes. It’s like having a piece of a fast, red Ferrari car right on your fingertips! How cool is that? If you’re someone who loves to stand out, Ferrari Red is the perfect color for you. It’s bold, exciting, and super stylish. Whether you’re dressing up for a party or just want to add a pop of color to your everyday look, red gel nail polish can make your nails look fabulous. In this guide, we’ll explore everything you need to know about red nails polish. We’ll check out the best products, their key features, and tips for rocking this amazing color. Let’s dive in and get those nails ready to shine!   What Makes Ferrari Red Nail Polish So Special? Ferrari Red isn’t just any red. It’s the red of dreams, the red of speed, and the red that turns heads! This nail polish color is inspired by the famous Ferrari cars, known for their fiery, dazzling red color. But what makes it stand out? This red shade is bright, bold, and perfect for anyone who wants to show off their fun side. It’s a color that matches any outfit, whether you’re in a cute dress or a cool pair of jeans. The best part? red blood nail polish is available in many brands, making it easy for everyone to try!   Key Features of Ferrari Red Nail Polish Let’s take a closer look at what makes red gel nail polish awesome. Below, we’ve got a handy table that highlights some of the key features you’ll love. Feature Description Vibrant Color Bright, bold red that stands out and adds flair to your look. Long-lasting Stays on for days without chipping or fading, keeping your nails pretty for longer. Quick Drying Dries quickly, so you can get back to playing in no time. Smooth Application Goes on your nails smoothly without streaks or bumps. Glossy Finish Leaves your nails shiny and beautiful, just like a brand-new car. Chip-Resistant Tough and durable, perfect for active kids who love to play. Easy to Remove Comes off easily with nail polish remover, no harsh scrubbing needed. Non-Toxic Safe for kids, free from harmful chemicals, making it a great choice for everyone.   How to Apply Ferrari Red Nail Polish Perfectly Applying nail polish is super fun, and with Ferrari Red, your nails will look like a million bucks! Here’s a simple guide to make sure your nails look perfect every time. Clean Your Nails: Start by washing your hands and making sure your nails are clean and dry. Remove any old polish with a gentle nail polish remover. Shape Your Nails: Use a nail file to shape your nails. Whether you like them round, square, or something in between, shaping them will make them look neat and pretty. Base Coat: Apply a thin layer of a base coat. This protects your nails and helps the Ferrari Red polish stick better. Apply Ferrari Red Polish: Now, it’s time for the fun part! Apply a thin layer of the Ferrari Red nail polish. Wait a few minutes for it to dry, then apply a second layer for a bold and bright look. Top Coat: Finish with a top coat to seal the color and add extra shine. This also helps your polish last longer. Clean Up: If you accidentally get polish on your skin, use a small brush dipped in nail polish remover to clean up the edges.   Best Ferrari Red Nail Polish to Try There are lots of brands that offer red gel nail polish, but which one should you pick? Here are some of the best options that you’ll love! 1. OPI Ferrari Red Nail Polish OPI’s Ferrari Red is a classic! It’s bright, smooth, and perfect for any occasion. Plus, it’s long-lasting, so your nails stay beautiful for days. 2. Essie Ferrari Red Essie’s version of Ferrari Red is vibrant and glossy. It’s super easy to apply and looks amazing with any outfit. 3. Sally Hansen Ferrari Red Sally Hansen’s polish is not only bright but also strengthens your nails. It’s chip-resistant, making it great for kids who love to play.   Why Kids Love Ferrari Red Nail Polish Kids love red nails polish because it’s just like painting their nails with fun! The color is bright and happy, making it a hit at parties, playdates, and even at school (if allowed). It’s also easy to apply and dries quickly, so you don’t have to wait long to show off your cool nails. Plus, it’s safe for kids, so parents don’t have to worry!   Tips for Rocking Ferrari Red Nails Mix and Match: Try adding some glitter or other colors for a fun mix-and-match look. Add Stickers: Nail stickers or decals can add a cute touch to your Ferrari Red nails. Go Matte: For a different look, try a matte top coat to turn your shiny red nails into a cool, velvety finish. Nail Art: Use nail art pens to draw fun designs, like hearts, stars, or even mini Ferraris!   FAQ’s About Ferrari Red Nail Polish Q1: Is Ferrari Red nail polish safe for kids? Yes! Most brands make non-toxic, kid-safe versions that are free from harmful chemicals. Always check the label to be sure. Q2: How long does red gel nail polish last? It usually lasts about 5-7 days without chipping, especially with a good top coat. Q3: Can I remove red blood nail polish easily? Yes, it’s easy to remove with standard nail polish remover. Just soak a cotton pad, press it on your nail, and wipe away! Q4: Does red nails polish look good on all skin tones? Absolutely! Ferrari Red is a universal shade that looks stunning on all skin tones. Q5: How can I make my Ferrari Red nails last longer? Using a base coat, two layers of polish, and a top coat can

Peach Color Nails
Nail Color

Peach Color Nails: The Ultimate Guide for Kids

Introduction Hey there, kids! Have you ever thought about trying a fun and pretty peachy pink nail color for your nails? Well, peach color nails are super cool and can make your hands look awesome. Peach is a mix of pink and orange, and it’s like the color of a juicy peach fruit. In this guide, we’re going to dive into why peach pink nail color is so great, how you can get them, and what makes them special. Ready to learn more? Let’s get started!   Product Information When it comes to peach color nails, you need some special nail polish to get that perfect shade. Nail polish is like magic paint for your beach colored nails, and peach color is a fantastic choice because it’s bright and cheerful. There are lots of different peach nail polishes out there. Some are really shiny, while others might have a matte finish. It’s all about what you like best.   Key Features of Peach Color Nails To help you choose the best peachy pink nail color, here’s a table with some important features to look for: Feature Description Color Shades Ranges from light pastel to deep peach tones. Finish Options Shiny, matte, or glittery finishes available. Long-Lasting Some polishes last longer without chipping. Quick Drying Dries quickly so you don’t have to wait long. Easy to Apply Comes with a brush that’s easy to use. Non-Toxic Safe for kids and doesn’t have harmful chemicals. Removable Easy to remove with nail polish remover. Affordable Many options that don’t cost too much.   Why Peach Color Nails Are Awesome Fun and Cheerful Peach color nails are so much fun! They can make you feel happy and bright, just like a sunny day. Whether you’re going to a party or just hanging out with friends, beach colored nails are perfect for making a statement. Matches Everything One of the best things about peach pink nail color is that they go with almost any outfit. You don’t have to worry about matching colors because peach is pretty versatile. It looks great with both casual and fancy clothes. Easy to Find Peach nail polish is pretty popular, so you can find it in most stores. Whether you’re looking online or at your local shop, there will be plenty of options to choose from.   How to Apply Peach Color Nails Prepare Your Nails Before applying any peachy pink nail color, make sure your nails are clean and dry. You might want to give them a little trim and shape them with a nail file. This makes the polish go on smoother and last longer. Apply a Base Coat A base coat is like a special primer for your nails. It helps the nail polish stick better and prevents your nails from getting stained. Just brush on a thin layer and let it dry. Paint on the Peach Color Now it’s time for the fun part! Apply your peach nail polish by starting at the base of your nail and brushing up to the tip. Make sure you cover the entire nail evenly. You might need to apply two coats to get the color just right. Finish with a Top Coat A top coat is like a protective shield for your nails. It keeps the peach color shiny and prevents it from chipping. Apply a thin layer on top of your dried nail polish and let it dry completely.   Peach Color Nails for Different Occasions Everyday Fun Peach nails are perfect for everyday fun. They’re bright enough to stand out but not too flashy. You can wear them to school, playdates, or just hanging out at home. Special Events For special occasions like birthday parties or family gatherings, peach color nails can add a touch of sparkle. You can even add some glitter polish on top for extra glam. Seasonal Styles Peach is a great color for all seasons. In spring and summer, it’s fresh and lively. In fall and winter, it can add a warm touch to your beach colored nails look.   FAQs Of Peach Color Nails Q1: What Is peachy pink nail color Made Of? Peach nail polish is made from a mix of pigments, solvents, and resins. The pigments give the color, while the solvents help the polish go on smoothly. Resins make the polish stick to your nails. Q2: How Do I Remove Peach Nail Polish? To remove peach nail polish, you’ll need nail polish remover. Just soak a cotton ball in the remover and gently rub it over your nails until the polish comes off. Q3: Can Kids Wear Peach Nail Polish? Yes, kids can wear peach nail polish! Just make sure to choose a non-toxic, kid-friendly option. It’s always a good idea to have an adult help with applying and removing the peach pink nail color. Q4: How Can I Make My Peach Nail Polish Last Longer? To make your peach nail polish last longer, apply a base coat and top coat. Also, try to avoid using your nails as tools and give them a break between polish applications. Q5: Where Can I Buy Peach Nail Polish? You can buy peach nail polish at many stores, including drugstores, beauty shops, and online. Look for brands that offer kid-friendly options.   Conclusion Peach color nails are a fun and cheerful way to brighten up your look. Whether you’re going for a casual day or a special event, peach is a great choice that’s easy to match with any outfit. Remember to follow the steps for applying and removing nail polish, and always choose products that are safe for kids. Have fun experimenting with different shades and finishes to find your perfect peachy look! And that’s it for our guide on peach pink nail color. We hope you enjoyed learning about this awesome color and how to make your beach colored nails look fantastic. Keep having fun with your nail art, and don’t be afraid to try new things!

Alien Nail Design
Nail Design

Alien Nail Design: A Fun and Out-of-This-World Guide

Introduction Today, we’re diving into the amazing world of Alien Nail Design. Imagine having tiny spaceships, glittery planets, and funky alien faces right on your nails. Sounds fun, right? Well, it is! This guide is here to help you create the most awesome Aztec nail designs, step by step. Whether you’re a nail art designs lace newbie or a pro, we’ve got tips and tricks for everyone. So, grab your nail polish, and let’s blast off into this colorful adventure!   Product Information Aztec nail designs are not just about slapping some colors on your nails. Oh no! They are all about creativity and having fun. You’ll need some special tools and materials to get those out-of-this-world designs just right. Here’s what you’ll need to start your alien nail journey: Nail Polish: Get a variety of colors, including neon greens, purples, and blues. These colors help create the perfect alien vibe. Nail Art Brushes: These are essential for painting tiny details like alien eyes and spaceship windows. Glitter and Gems: To make your design sparkle like the stars! Nail Stickers: These are great for quick and easy alien designs if you don’t want to paint everything. Top Coat: This helps your design last longer and keeps it shiny. Let’s take a look at these products in more detail:   Key Features Of Alien Nail Design Product Description Key Features Nail Polish Various colors for creating alien designs. Neon colors, fast-drying, long-lasting. Nail Art Brushes Brushes of different sizes for detailing. Fine tips for precision, easy to use. Glitter and Gems Add sparkle and dimension to your nails. Assorted colors and sizes, adhesive backing. Nail Stickers Ready-made designs for quick application. Easy to apply, comes in various alien themes. Top Coat Protective layer to seal your design. Glossy finish, extends wear of the design.   Getting Started with Alien Nail Design Choosing Your Colors The first step in creating Aztec nail designs is picking out your colors. Bright and neon colors work best. Think about green, purple, and blue. These colors will make your nail art designs lace stand out and look super cool. Don’t forget to add some metallic shades like silver and gold for extra sparkle. Tools of the Trade Next, gather all your tools. Nail art brushes are a must for painting tiny details like alien eyes and spaceship windows. You’ll also need glitter and gems to add some sparkle. And, of course, a top coat to keep your design looking fresh and shiny. Basic Techniques Let’s start with some basic techniques. First, apply a base coat to protect your nails and make the colors pop. Then, use your chosen colors to create the background of your alien design. Once the base is dry, add your alien details using your nail art brushes. You can paint little aliens, spaceships, or even planets.   Creating Fun Alien Nail Design Space-Themed Nails For a space-themed look, start with a dark blue or black base. Then, use white or silver polish to add stars and planets. You can also use glitter to make it look like a galaxy. Don’t forget to add some colorful rhinestone designs on nails for an extra touch. Alien Faces Of Alien Nail Design If you want to go all out, try painting little alien faces on your nails. Use bright green or purple polish for the alien skin. Then, add eyes and antennas with a thin brush. This design is perfect for anyone who loves a bit of whimsy. Spaceships and Rockets Spaceships are another fun design to try. Start with a base color like silver or metallic blue. Then, use a small brush to paint the spaceship details. You can even add some glitter to make it look like the ship is zooming through space!   Tips and Tricks Of Alien Nail Design Drying Time Make sure each layer of polish is completely dry before applying the next one. This prevents smudging and helps your design look clean and neat. Clean Up Use a nail brush and remover to clean up any mistakes around your nails. This will make your alien designs look professional and polished. Experiment and Have Fun Don’t be afraid to try different colors and designs. The best part of nail art is that you can be as creative as you want. Mix and match different elements to create your perfect alien look.   FAQs Of Alien Nail Design 1. What if I make a mistake? Don’t worry! You can use nail polish remover to fix any mistakes. Just dip a small brush in remover and carefully clean up the areas where you went outside the lines. 2. How long does the nail design last? With a good top coat, your alien nail design can last for about a week. Make sure to apply the top coat carefully and avoid any rough activities that could chip your nails. 3. Can I use nail stickers instead of painting? Absolutely! Nail stickers are a quick and easy way to get a fun alien design. Just stick them on and seal with a top coat. 4. How do I remove the design when I’m done? To remove your alien nail design, use nail polish remover. Soak a cotton ball in the remover and press it onto your nail for a few seconds before wiping away the polish. 5. Can kids do this nail art? Yes, kids can definitely try out rhinestone designs on nails with some help from an adult. Just make sure to use kid-friendly nail polishes and tools.   Conclusion So, there you have it! Alien Nail Design are a fantastic way to add some fun and creativity to your look. Whether you choose to go for a galaxy theme, paint little aliens, or create cool spaceships, the possibilities are endless. Remember to have fun with your rhinestone designs on nails and don’t be afraid to try new things. With the right tools and a little imagination, your nails will be the

White and Pink Gel Nails
Nail Gel

White and Pink Gel Nails: The Ultimate Guide

Introduction Hey there! Do you love pretty nails and cool designs? White and pink gel nails are like a magical combo that makes your nails look super awesome. They are perfect for any occasion, whether it’s a fun party or just a regular day at school. Gel nails are a bit special because they last longer than regular nail polish. They also look shiny and fresh for a longer time. In this guide, we’ll talk about everything you need to know about white glitter gel nails. Let’s dive in and discover how to make your 3d nail art gel look fantastic!   What Are White and Pink Gel Nails? 3d nail art gel are a beautiful way to make your nails look amazing. Gel nails are a type of manicure where a special gel is used instead of regular nail polish. The gel is applied in layers and then cured under a UV or LED light. This makes the gel harden and stay in place for a longer time.   Why Choose White and Pink Gel Nails? Why are my gel nails peeling are a great choice because they are both stylish and versatile. You can wear them to almost any event or occasion. The white gives a clean and classic look, while the pink adds a touch of fun and elegance. Together, they make a lovely combination that’s hard to beat!   Product Information White and pink gel nails come in various brands and styles. Here’s a bit more about what you can find: Gel nail kits usually include: Base Coat: This helps the gel stick to your nails and makes it last longer. Color Gel: This is the fun part! You get to choose the white, pink, or any other color you like. Top Coat: This adds a shiny finish and protects your nails from chips. UV/LED Lamp: This helps to cure (or harden) the gel so it stays on your nails.   Key Features of White and Pink Gel Nails Here’s a table with the key features of white glitter gel nails: Feature Description Color Options Includes white, pink, and other fun shades Durability Lasts up to 2-3 weeks without chipping Shine Provides a glossy finish that looks freshly done Drying Time Cured quickly under a UV or LED lamp Application Easy to apply with a base coat, color gel, and top coat Removal Requires soaking in acetone or using a gel remover Safety Safe for nails when used correctly Variety Available in different finishes like matte or glitter   How to Apply White and Pink Gel Nails Applying why are my gel nails peeling can be a fun activity. Here’s a step-by-step guide to help you do it right: Step 1: Prepare Your Nails Start by cleaning your nails and removing any old 3d nail art gel. Gently file your nails to the shape you like. Step 2: Apply the Base Coat Brush a thin layer of the base coat on your nails. This helps the gel stick better. Cure the base coat under the UV/LED lamp for the time recommended by the gel kit. Step 3: Apply the Color Gel Choose your color gel (white or pink) and apply a thin layer. Make sure to cover the whole nail. Cure this layer under the lamp. You may need to apply more than one coat for a stronger color. Step 4: Apply the Top Coat Brush a layer of top coat over the color gel. This adds shine and protects your nails. Cure the top coat under the lamp. Step 5: Remove the Sticky Layer Some gel nails leave a sticky residue after curing. Wipe it off with a nail cleanser or alcohol-soaked cotton pad. Step 6: Enjoy Your Beautiful Nails! Your white and pink gel nails should now be shiny and perfect. Show them off and enjoy your stylish new look!   Tips for Maintaining Gel Nails Taking care of your gel nails helps them stay beautiful for longer. Here are some tips: Avoid Harsh Chemicals: Try not to use strong cleaning products without gloves, as they can damage your gel nails. Keep Nails Hydrated: Use cuticle oil to keep your nails and cuticles moisturized. Be Gentle: Avoid using your nails as tools. Be careful to prevent chipping or lifting.   FAQs About White and Pink Gel Nails 1. How long do white glitter gel nails last? Why are my gel nails peeling can last between 2 to 3 weeks without chipping. The 3d nail art gel is designed to stay strong and shiny for a longer time than regular nail polish. 2. Can I remove gel nails at home? Yes, you can remove gel nails at home. You’ll need to soak your nails in acetone or use a gel nail remover. It’s important to follow the instructions carefully to avoid damaging your nails. 3. Are gel nails safe for kids? Gel nails are generally safe, but they are usually recommended for older children and adults. If you’re a kid, it’s best to use regular nail polish or consult a parent before trying gel nails. 4. What should I do if my gel nails start to lift? If your gel nails start to lift, it’s important to get them fixed as soon as possible. You can either visit a nail salon or gently file down the lifted area and apply a new layer of gel. 5. Can I use regular nail polish over gel nails? It’s not recommended to use regular nail polish over gel nails because it might not adhere well and could cause the gel to lift. Stick to gel polish for the best results.   Conclusion White and pink gel nails are a fabulous choice for anyone who wants stylish and durable nails. They look great for any occasion and last longer than regular nail polish. By following the steps to apply them and taking care of them properly, you can enjoy beautiful nails for weeks. We hope this guide helps

Pink Gel Nail Polish
Pink Nail

Pink Gel Nail Polish: The Ultimate Guide

Welcome to the world of pink gel nail polish! If you’re new to nail polish or just curious about pink shades, you’re in the right place. This guide will help you learn everything you need to know about pink sparkle nail polish, from choosing the best one to applying it like a pro. We’ll break it down into easy steps and fun facts so you can enjoy every bit of your nail polish adventure.   What is Pink Gel Nail Polish? Pink nude nail polish is a special type of nail polish that needs a UV or LED light to dry. It lasts longer than regular nail polish and gives your nails a shiny, smooth finish. It’s perfect for anyone who loves having beautiful nails without having to repaint them all the time. Pink holographic nails comes in many shades, from soft baby pinks to bright, vibrant pinks. It’s a great choice for any occasion, whether you’re going to a party or just want to add a touch of fun to your everyday look.   Product Information When you pick out a pink sparkle nail polish, there are a few things to look for to make sure you get the best one. Here’s a simple guide to help you choose:   What to Look For in Pink Gel Nail Polish Quality: High-quality gel polish will last longer and look better. Color: Choose a shade that you love and that suits your style. Brand: Some brands are known for their great gel nail polishes, so check reviews and ratings. Ingredients: Make sure it doesn’t have any harmful chemicals. Price: Higher price doesn’t always mean better quality, so look for something that fits your budget.   Key Features of Pink Gel Nail Polish Here’s a handy table showing the key features to look for: Feature Description Long-lasting Stays on your nails for up to two weeks. Shiny Finish Gives a glossy, smooth look. Quick Drying Dries quickly under a UV or LED light. Easy Removal Can be removed with gel nail polish remover. Variety Available in many shades of pink. Durability Resistant to chipping and peeling. Non-Toxic Free from harmful chemicals. Affordable Comes in a range of prices to fit any budget.   Why Choose Pink Gel Nail Polish? Pink holographic nails is a popular choice for many reasons. Let’s explore why you might want to give it a try: Long-Lasting Beauty One of the best things about pink nude nail polish is how long it stays on your nails. Unlike regular nail polish that can chip and fade, gel polish can last up to two weeks without losing its shine. This means you won’t have to worry about constant touch-ups. Shiny and Smooth Pink gel nail polish gives your nails a beautiful, glossy finish. It looks smooth and shiny, making your nails look like they were just done at a salon. It’s perfect for special occasions or just to make your everyday look more exciting. Quick and Easy Applying pink sparkle nail polish is quick and easy. You just need to apply a thin layer, cure it under a UV or LED light, and you’re done! The whole process is faster than traditional nail polish, and you won’t have to wait for it to dry completely.   How to Apply Pink Gel Nail Polish Applying pink holographic nails might seem tricky at first, but with a little practice, you’ll get the hang of it. Here’s a simple step-by-step guide to help you: Step 1: Prepare Your Nails Before you start, make sure your nails are clean and dry. Remove any old polish and trim your nails if needed. You can also push back your cuticles to give your nails a neat look. Step 2: Apply a Base Coat Start by applying a thin layer of base coat to your nails. This helps the gel polish stick better and can prevent staining. Cure the base coat under a UV or LED light according to the instructions on your polish. Step 3: Apply the Pink Gel Polish Once the base coat is dry, apply a thin layer of pink gel polish. Make sure to cover the entire nail and avoid getting any polish on your skin. Cure this layer under the UV or LED light. Step 4: Add a Second Coat For a more vibrant color, apply a second layer of pink gel polish. Again, cure it under the light. If needed, you can add more layers to achieve your desired shade. Step 5: Finish with a Top Coat To protect your polish and give it a glossy finish, apply a layer of top coat. Cure this final layer under the UV or LED light. Step 6: Clean Up After curing, wipe your nails with a lint-free wipe soaked in alcohol to remove any sticky residue. Your nails are now ready to show off!   Tips for Perfect Pink Gel Nails Here are some extra tips to help you get the best results with your pink gel nail polish: Keep Your Nails Healthy Healthy nails will look better and last longer. Make sure to moisturize your cuticles and avoid biting your nails. Don’t Skip the Base and Top Coats Base and top coats are important for a long-lasting manicure. They help the polish adhere better and prevent chipping. Avoid Overloading Your Brush When applying the gel polish, use a small amount of polish on your brush. Too much can lead to uneven application and may cause the polish to smudge. Follow the Instructions Always follow the instructions on your gel polish for curing times and application. Different brands may have different requirements.   FAQs About Pink Gel Nail Polish 1. How long does pink holographic nails last? Pink gel nail polish can last up to two weeks if applied correctly. It’s more durable than regular nail polish and resists chipping and peeling. 2. Can I use regular nail polish remover to remove gel polish? No, you need a special gel nail polish

Blue Nail Polish Colors
Nail Polish

Blue Nail Polish Colors: A Fun Guide to Finding Your Perfect Shade

Welcome to the fun and colorful world of Blue Nail Polish Colors! If you’ve ever wondered about the different shades of blue neon nail polish and what makes each one special, you’re in the right place. In this guide, we will explore everything you need to know about blue nail polish colors. From light and airy to deep and mysterious, there’s a blue for every mood and occasion. Let’s dive in and discover the magic of blue sparkle nail polish!   Introduction Blue nail polish is not just a color; it’s a statement. Whether you’re getting ready for a party, a school event, or just want to feel a little extra sparkle, blue green nail polish can make your nails pop. Blue is a color that symbolizes calmness, trust, and creativity. It can range from soft pastels to vibrant hues, and each shade has its own unique charm. In this guide, we will look at different types of blue nail polish colors and how to choose the perfect one for you. We will also talk about some popular brands and their key features. So, if you’re ready to explore, let’s get started!   Product Information When it comes to choosing blue sparkle nail polish, there are so many options! Each shade has its own special touch. Here’s a quick overview of some popular blue nail polish options: Light Blue: This shade is perfect for a soft, gentle look. It’s great for everyday wear and gives your nails a fresh, clean appearance. Royal Blue: If you want to make a bold statement, royal blue is the way to go. It’s vibrant and eye-catching, perfect for special occasions. Navy Blue: This deep, dark blue is perfect for a sophisticated look. It’s a great alternative to black and can be very stylish. Sky Blue: Sky blue is a fun and playful color that reminds us of clear, sunny days. It’s great for a cheerful, happy look. Turquoise Blue: This blue neon nail polish has a hint of green, making it a refreshing and unique choice. It’s perfect for summer and adds a touch of flair.   Product Key Features Of Blue Nail Polish Colors Here are some key features of different blue nail polish options: Feature Light Blue Royal Blue Navy Blue Sky Blue Turquoise Blue Shade Soft and gentle Bold and vibrant Deep and dark Bright and cheerful Refreshing and unique Best For Everyday wear Special occasions Sophisticated look Cheerful and happy looks Summer and exotic styles Finish Matte or glossy Glossy or glittery Glossy or matte Glossy or shimmery Shimmery or glossy Duration Long-lasting Long-lasting Long-lasting Medium-lasting Long-lasting Application Easy to apply Easy to apply Requires careful application Easy to apply Requires careful application Drying Time Fast Fast Medium Fast Medium Price Range Affordable Mid-range Mid-range Affordable Mid-range Brand Options Various drugstore brands High-end and drugstore brands High-end and drugstore brands Various drugstore brands High-end and drugstore brands   Types of Blue Nail Polish Colors 1. Light Blue Light blue neon nail polish is like a breath of fresh air. It’s soft and subtle, making it a great choice for school or casual outings. This shade is perfect if you want a gentle, everyday look. 2. Royal Blue Royal blue is a fantastic choice for making a bold statement. This color is bright and vivid, making your nails stand out. It’s great for parties and special occasions where you want to shine. 3. Navy Blue Navy blue is a classic and elegant color. It’s darker than royal blue and has a sophisticated vibe. Navy blue is perfect for formal events or if you want a sleek, stylish look. 4. Sky Blue Sky blue is light and airy, just like the sky on a sunny day. It’s a fun and playful color that’s great for casual days out or summer adventures. 5. Turquoise Blue Turquoise blue green nail polish is a unique and refreshing shade. It combines blue and green, giving it a tropical feel. This Blue Nail Polish Colors is perfect for summer and can make your nails look like a beautiful sea.   Choosing the Right Blue Nail Polish Colors When picking a blue sparkle nail polish, think about what look you want. Do you want something subtle and everyday, or something bold and special? Here are some tips to help you choose: Occasion: Light blue is great for school and everyday wear. Royal blue is perfect for parties, while navy blue suits formal events. Season: In summer, go for sky blue or turquoise. In winter, navy or royal blue might be more fitting. Skin Tone: Different shades of blue look good on different skin tones. Try out a few shades to see which one you like best!   How to Apply Blue Nail Polish Colors Applying blue neon nail polish can be fun and easy if you follow these steps: Prepare Your Nails: Start by cleaning your nails and removing any old polish. Make sure your nails are dry before applying the new polish. Apply Base Coat: A base coat helps the polish stick better and prevents staining. Apply a thin layer and let it dry. Apply Nail Polish: Apply the blue nail polish in thin layers. Start from the base of your nail and work your way to the tip. Let each layer dry before applying the next. Apply Top Coat: A top coat adds shine and helps your nail polish last longer. Apply a thin layer and let it dry. Clean Up: Use a cotton swab dipped in nail polish remover to clean up any mistakes around your nails.   FAQs Of Blue Nail Polish Colors 1. How long does blue nail polish last? Blue nail polish can last from a few days to a couple of weeks, depending on the brand and how well you take care of your nails. Using a base coat and top coat can help make it last longer. 2. Can I wear blue nail polish for formal events? Yes, you

Evil Eye Nail Design
Nail Design

Evil Eye Nail Design: A Fun and Stylish Way!

Introduction Hey there, nail art lovers! Ever heard of the Evil Eye Nail Design? It’s not as spooky as it sounds. Actually, it’s a cool symbol that people believe can protect you from bad luck. And guess what? It’s become super trendy in nail art! Imagine having carnival nail designs that not only look fabulous but also keep bad vibes away. Sounds fun, right? In this guide, we’re diving into the world of rudolph nail design. So, grab your favorite nail polish and let’s explore this awesome trend together! What Are Evil Eye Nail Design?   Bohemian nail design is all about decorating your nails with the famous evil eye symbol. The evil eye is usually a blue and white eye with a black dot in the middle, and it’s believed to protect you from any negative energy. How cool is that? People have been using the evil eye symbol for thousands of years, from ancient Greece to modern times. And now, it’s a major trend in fashion and nail art. Whether it’s a full set of evil eyes or just one on an accent nail, these designs are super fun and can be customized in so many ways! Why Choose Evil Eye Nail Design? Why not add a little magic to your nails? Rudolph nail design aren’t just beautiful—they’re also a way to express yourself and show off your unique style. Plus, they come in all shapes, sizes, and colors, so you can mix and match to fit your mood or outfit. Ready to get started? Let’s dive deeper into the world of evil eye nails and discover all the fun ways you can style them! Key Features of Evil Eye Nail Design Evil eye nail design are not just any nail art; they’re packed with cool features that make them stand out. Check out the table below to see some of the key features of these magical nail designs. Key Feature Description Symbolic Meaning Represents protection, good luck, and warding off negative energy. Color Variations Typically blue and white, but can also include other colors like gold, pink, and silver for a more personalized look. Customization Can be combined with other designs like stars, moons, or geometric shapes. Easy to Apply Available in nail stickers, press-ons, or can be hand-painted by a nail artist for a unique touch. Versatility Suitable for all nail shapes and lengths, from short nails to long stiletto tips. Trendy A popular trend on social media and among celebrities, making it a stylish choice for fashion-forward individuals. Durability When applied correctly, evil eye designs can last for weeks without chipping, especially with gel polish. Fun for All Ages Great for both kids and adults; can be made as simple or as detailed as you like! Types of Evil Eye Nail Design There are so many ways to rock carnival nail designs! Whether you’re going for a subtle look or something bold and bright, there’s a style for everyone. 1. Classic Evil Eye Design This is the traditional bohemian nail design with a blue, white, and black eye. It’s simple yet striking and works well with any outfit. You can keep it classy with just one evil eye on each hand or go all out with a full set. 2. Colorful Evil Eye Designs Why stick to just blue and white? Mix it up with different colors like pink, green, or even rainbow! This adds a fun twist and makes your nails really stand out. 3. Glitter and Gems Evil Eye For a little extra sparkle, add some glitter or tiny gems around your evil eyes. This gives your nails a glamorous look that’s perfect for parties or special occasions. How to Create Your Own Evil Eye Nail Design Now that you know what evil eye nails are all about, let’s learn how to create them at home. Don’t worry, you don’t need to be a professional nail artist to get started! Step-by-Step Guide to Evil Eye Nails Step 1: Gather Your Supplies Base coat and top coat Blue, white, and black nail polish (or any colors you prefer) Nail art brushes or dotting tools Nail stickers or gems (optional) Step 2: Prep Your Nails Start by cleaning and trimming your nails. Apply a carnival nail designs base coat to protect your nails and help the polish stick better. Step 3: Paint Your Nails Paint your nails with a base color of your choice. Light colors like white or nude work well as a background for the evil eye. Step 4: Create the Evil Eye Use a dotting tool or a thin brush to create a blue circle in the middle of your nail. Add a smaller white circle inside, and finish with a tiny black dot in the center. Voila! You’ve got an evil eye! Step 5: Add Extras If you want to get creative, add some glitter, gems, or other designs around the eye. This is where you can really make the design your own! Step 6: Seal the Deal Finish with a top coat to protect your Rudolph nail design and give your nails a glossy shine. And there you have it—your very own evil eye nails! Tips for Perfect Evil Eye Nails Practice Makes Perfect: If you’re new to nail art, practice on a piece of paper or a nail art wheel first. Be Patient: Let each layer of polish dry before adding the next to avoid smudging. Use Stickers: Not confident with freehand? Use evil eye stickers or decals for an easy and quick option.   FAQs about Evil Eye Nail Design 1. Can I do evil eye nails at home? Absolutely! With some nail polish, a steady hand, and a little patience, you can create your own evil eye nails at home. You can also use nail stickers if you’re not confident in your painting skills. 2. What colors are best for carnival nail designs? The classic colors are blue, white, and black, but you can get creative

Milk Pink Nail Polish
Nail Polish

Milk Pink Nail Polish: The Ultimate Guide

Introduction Hey there! Are you curious about milk pink nail polish? Well, you’ve come to the right place! This guide is all about this trendy nail color that’s perfect for kids and adults alike. Milk pink nail polish is soft, sweet, and super stylish. It’s like wearing a cloud of candy on your nails. This shade is perfect for any occasion—whether you’re going to a birthday party or just want to look extra cute on a regular day. In this article, we’ll explore everything you need to know about nude pink nail polish, from what it is to its amazing features. So, let’s dive in! What is Milk Pink Nail Polish? Pink glitter nail polish is a light and creamy shade of pink. It’s softer than bright pink but still makes your nails pop. Imagine the soft pink of a strawberry milkshake or the blush of a baby doll—it’s just like that! This polish is perfect for anyone who loves soft, pastel colors. It’s also great for kids because it’s gentle on the eyes and looks adorable. You can wear it to school, parties, or just for fun at home. Plus, it goes with everything! Key Features of Milk Pink Nail Polish Here’s a quick look at what makes nude pink nail polish so special. Let’s break it down in a super easy-to-understand table! Feature Description Color A soft, light pink, just like milk mixed with a hint of strawberry. Shine Offers a gentle shine that’s not too flashy, perfect for a natural look. Kid-Friendly Safe and gentle, usually free of harsh chemicals, making it great for kids. Easy Application Comes with a smooth brush for easy, mess-free application. Quick-Drying Dries fast, so you don’t have to wait long before playing or showing off your nails. Long-Lasting Stays on for several days without chipping, even when you’re busy having fun! Peel-Off Options Some milk pink polishes are peel-off, so you can change your look without using nail polish remover. Perfect for All Ages While it’s great for kids, milk pink is also loved by teens and adults alike. Why Choose Milk Pink Nail Polish? 1. It’s Super Versatile Pink glitter nail polish isn’t just for fancy occasions—it’s perfect for every day! Whether you’re dressing up for a family dinner or just playing with friends, this color adds a sweet touch to any outfit. It’s like wearing a little bit of happiness on your fingers! 2. Easy to Match One of the best things about milk pink is that it goes with almost everything. It looks amazing with blues, whites, and even greens. If you have a favorite outfit, chances are, milk pink nails will make it look even better. It’s like a magic color that just works! 3. Fun to Use Putting on nail polish can be a fun activity, especially if you’re doing it with friends or family. With its smooth brush and quick-drying formula, nude pink color nail polish makes painting your nails a breeze. Plus, there’s no need to worry about messes or smudges! How to Apply Milk Pink Nail Polish Perfectly Step 1: Clean Your Nails Before you start, make sure your nails are clean. Wash your hands with soap and water, and dry them well. If there’s old polish, gently remove it with nail polish remover. Step 2: Shake the Bottle Give your nail polish bottle a good shake. This mixes up the color so it goes on smoothly. Step 3: Apply a Base Coat A base coat helps protect your nails and makes the color last longer. Apply one thin layer and let it dry completely. Step 4: Paint Your Nails Now for the fun part! Dip the brush into the polish and wipe off any extra. Start painting in the middle of your nail and then do the sides. Try to keep your strokes smooth and even. You can do one or two coats depending on how light or dark you want the color. Step 5: Add a Top Coat A top coat is like a shield for your nail polish. It keeps your color from chipping and adds a nice shine. Just paint one thin layer over your milk pink polish, and you’re all set! Tips for Making Your Milk Pink Nail Polish Last Longer Keep Your Nails Dry: Try to keep your hands dry for at least an hour after painting your nails. Water can make your polish chip. Avoid Harsh Chemicals: Wear gloves if you’re doing chores like washing dishes. Harsh soaps and chemicals can damage your polish. Touch Up When Needed: If your polish chips, don’t worry! Just add a little polish to the chipped area, and you’re good to go. Different Styles with Milk Pink Nail Polish 1. Plain and Simple: Just apply milk pink polish, and you’re ready! It’s perfect for a clean and elegant look. 2. Glitter Fun: Add a little glitter on top of your milk pink polish for some extra sparkle. It’s great for parties or special events. 3. Mix and Match: Paint some nails milk pink and others a different color, like white or light blue. It’s a fun way to mix things up! 4. Cute Stickers: You can add tiny stickers like stars, hearts, or flowers on top of your milk pink polish. It’s super cute and easy to do! 5. French Tips: Try painting the tips of your nails white or a brighter pink. It’s a classic style that looks amazing with milk pink. Milk Pink Nail Polish and Nail Health It’s not just about looking pretty! nude pink color nail polish can also help keep your nails healthy. Many polishes are enriched with vitamins like vitamin E or calcium that strengthen your nails. Plus, the polish acts as a protective barrier, keeping your nails safe from dirt and damage.   Frequently Asked Questions (FAQs) 1. Is milk pink nail polish safe for kids? Yes! Most nude pink nail polish are made with gentle, non-toxic ingredients that are safe for

Black Color Nail Polish
Nail Polish

Black Color Nail Polish: A Fun and Kid-Friendly Guide!

Introduction Hey there, little fashionistas! 💅 Are you curious about Black Color Nail Polish? Well, you’re in the right place! Black nail polish is super cool and looks great on anyone. It’s like a tiny art project right on your nails! Whether you’re just exploring nail colors or want to add some edgy style, black nail polish can be your new best friend. In this guide, we’ll learn everything about black nail polish—from why it’s so popular to how to wear it and even how to take care of your nails. Ready to dive in? Let’s get started! What is Black Color Nail Polish? Black nail polish is simply a nail color that is, you guessed it, black! 🖤 It’s bold, it’s classic, and it goes with almost everything. People love black nail polish because it looks super stylish and can be worn in many ways. You can wear it alone for a sleek look or mix it up with glitter, stickers, or even nail art for a fun and unique style. Black nail polish isn’t just for grown-ups. Kids and teens can rock it too! It’s perfect for Halloween, parties, or just showing off your cool style. And don’t worry, you can find black nail polish that’s safe for little fingers and easy to remove. Why Do People Love Black Color Nail Polish? 1. It Matches Everything! Black is a neutral color, which means it goes with any outfit. Whether you’re wearing your favorite rainbow dress or a simple T-shirt and jeans, black nail polish will always match. 2. It’s Super Stylish Black nails have a chic and modern look. Many celebrities and fashion icons love wearing Black Color Nail Polish because it’s trendy and never goes out of style. 3. Great for Nail Art If you like being creative, black nail polish is the perfect canvas! You can add white dots, glitter, or even tiny stickers to make your nails pop. Key Features of Black Color Nail Polish Here are some important things to know about black nail polish: Feature Description Bold Color Black nail polish has a bold, eye-catching color that stands out. Versatile Goes with any outfit or style—dressy or casual. Available in Many Finishes Comes in glossy, matte, glitter, and even magnetic finishes. Easy to Pair Matches with other nail colors and accessories. Long-Lasting Often stays on nails without chipping for days. Safe for Kids Some brands offer non-toxic, kid-safe options. Quick Drying Many black nail polishes dry quickly, perfect for little ones. Affordable You can find good-quality black nail polish at budget-friendly prices. How to Apply Black Color Nail Polish Applying black nail polish is easy and fun! Here’s a step-by-step guide: 1. Clean Your Nails Start with clean nails. Wash your hands and gently push back your cuticles with a nail stick or your thumb. 2. Use a Base Coat Applying a clear base coat helps protect your nails and makes the polish last longer. It’s like a protective shield for your nails! 3. Apply the Black Color Nail Polish Shake your bottle of black nail polish. Then, carefully brush it onto your nails. Start with one stroke in the middle, then fill in the sides. Be sure to keep your strokes even. 4. Let It Dry Be patient! Let your nails dry completely before touching anything. This helps avoid smudges and keeps your nails looking perfect. 5. Add a Top Coat A clear top coat will make your Black Color Nail Polish shiny and help it last longer. It also protects your nail art if you’ve added any designs. Cool Ways to Style Your Black Nails 1. Glitter and Glam Add some sparkle to your black nails with glitter! You can paint your nails black and then sprinkle some glitter on top while they’re still wet. Let it dry, and voilà! Sparkly nails fit for a party! 2. Polka Dots Use a toothpick or a dotting tool to add white dots on your black nails. This style is super cute and easy to do. Just dip the tool into white nail polish and dot it on your nails. 3. Black and Gold Black and gold are a perfect match. You can paint some nails black and others gold or add gold stripes to your black nails for a fancy look. 4. Matte Black Try a matte black finish for a soft and sophisticated style. You can find matte Black Color Nail Polish, or just add a matte top coat over your glossy black nails. Caring for Your Nails After Polish Taking care of your nails after wearing polish is just as important as applying it! Here’s how to keep your nails healthy: 1. Remove Polish Gently Use a gentle, non-acetone nail polish remover. Soak a cotton ball and press it on your nail for a few seconds, then wipe away the polish. 2. Moisturize Your Nails Just like your skin, your nails need moisture too! Rub a little hand lotion or cuticle oil on your nails to keep them strong and healthy. 3. Let Your Nails Breathe It’s a good idea to give your nails a break from polish now and then. Let them rest for a few days before applying new polish.   FAQs about Black Color Nail Polish 1. Is Black Nail Polish Safe for Kids? Yes, but you should always choose a kid-friendly, non-toxic brand. Look for polishes that are free from harsh chemicals like formaldehyde and acetone. 2. How Do I Make Black Nail Polish Last Longer? Using a base coat and a top coat will help your Black Color Nail Polish last longer. Also, avoid picking at your nails and be careful when using your hands. 3. Can I Wear Black Nail Polish to School? It depends on your school’s rules! Some schools allow nail polish, while others don’t. It’s always good to check before wearing it to school. 4. Why Does Black Nail Polish Chip So Easily? If your nails are not clean or you

Scroll to Top