Nail Polish

Lavender Nail Polish
Nail Polish

Lavender Nail Polish: A Guide for Beautiful and Relaxing Nails

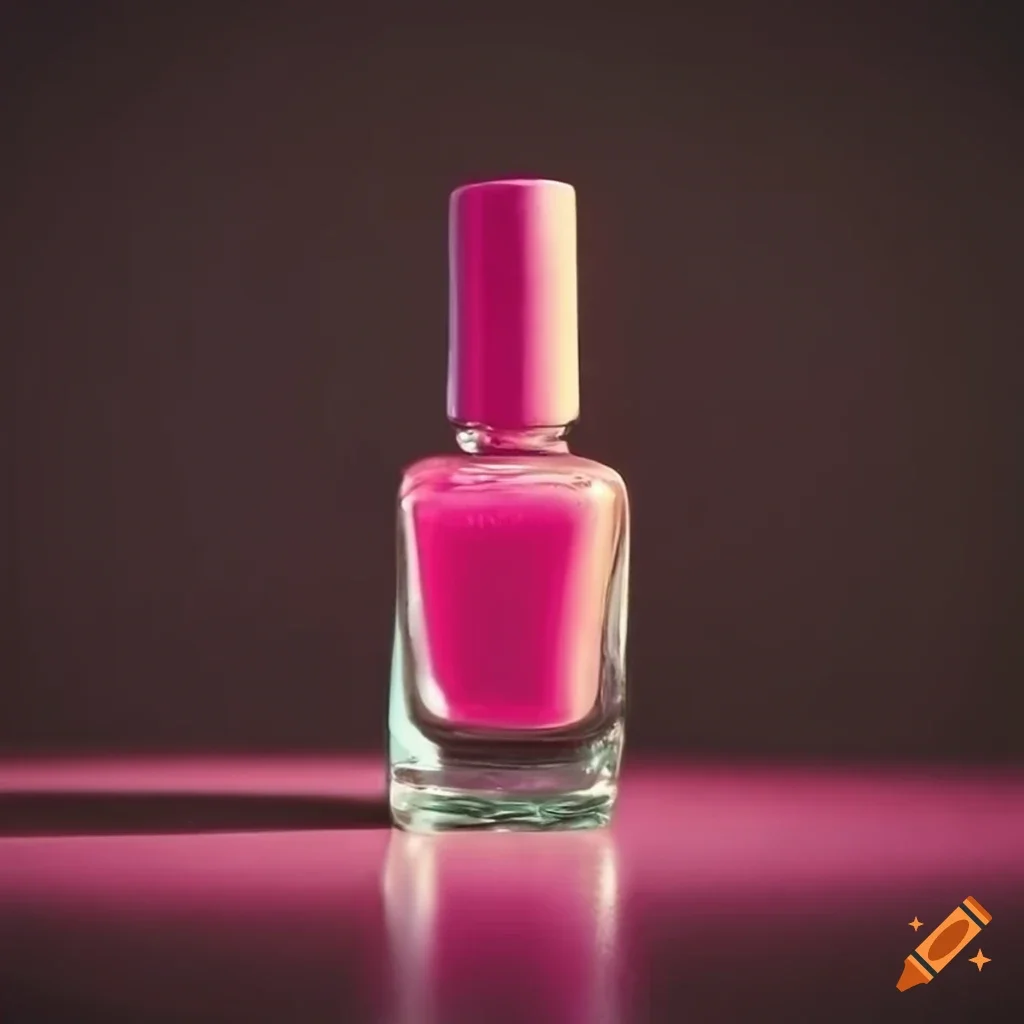
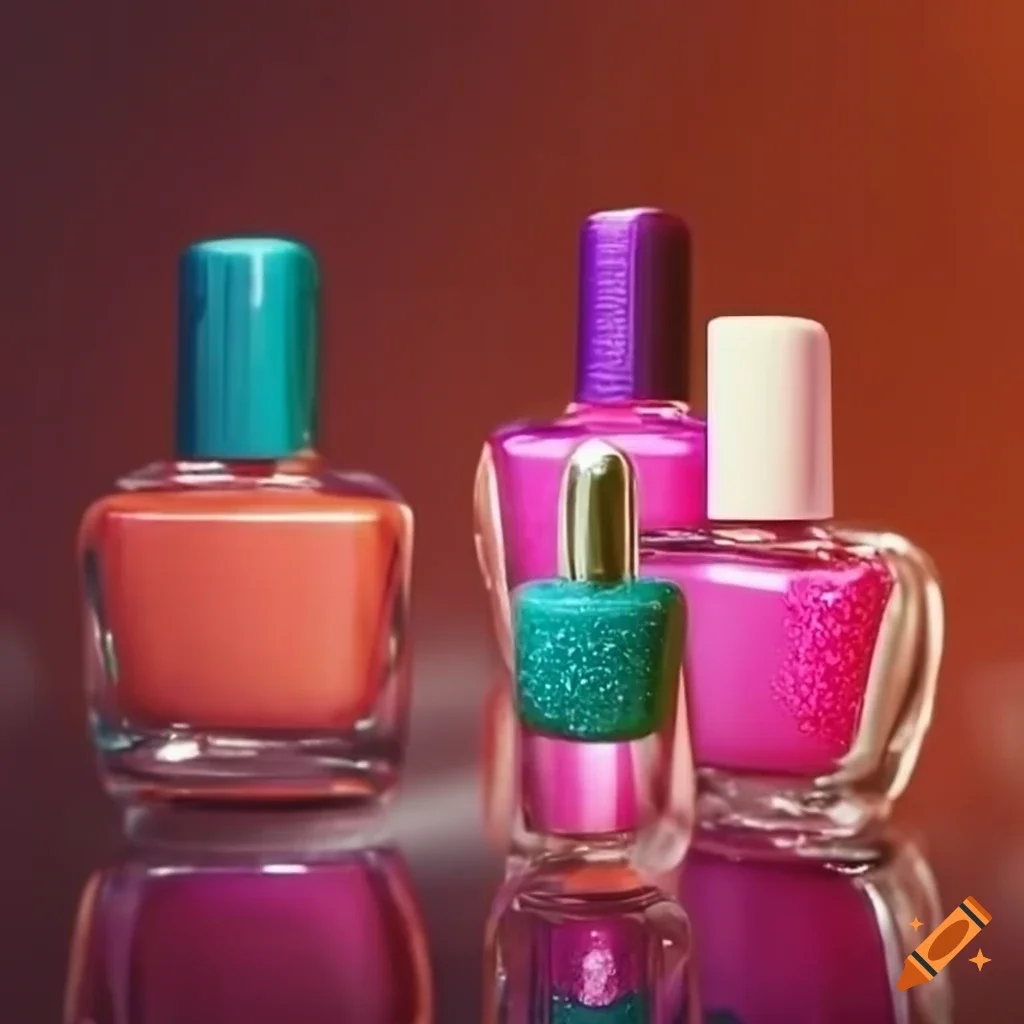
Introduction: Lavender nail polish is perfect for adding a soft, calming touch to your nails. Whether you’re getting ready for a special event, or just want to make your nails look pretty, lavender is a color that works for everyone. It’s light, fun, and looks good on all skin tones. In this guide, we’ll talk all about light lavender nail polish and why it’s such a popular choice. We’ll go through different styles, designs, and products that will help you choose the best lavender nail polish. We’ll also give you a list of must-have features so you can make an informed decision.   Why Choose Lavender Nail Polish? Sheer lavender nail polishis a great color for many reasons. It’s both playful and elegant, making it the right choice for casual days and special occasions. The soft purple shade also brings a calm feeling. When you wear it, your nails will look fresh and trendy without being too bold or overwhelming. Perfect for Any Occasion Lavender nail polish is very versatile. You can wear it to school, family gatherings, or even fancy parties. It matches well with many outfits, whether you are wearing jeans, a dress, or something more formal. Fun Designs with Lavender You can do so much with sheer lavender nail polish. From simple, one-color nails to more detailed designs like flowers or glitter, lavender is a great base color. It pairs beautifully with other colors like white, silver, or even pink for a cute and stylish look.   Top Lavender Nail Polish You Should Try Here are some popular light lavender nail polish products that are loved by many. These nail polishes offer high-quality results and are perfect for kids and adults alike. 1. Essie – Lilacism Essie’s Lilacism is a soft, pastel lavender shade. It’s perfect for those who love light, subtle colors. Essie is known for its smooth formula that’s easy to apply, making it a favorite among many nail lovers. 2. OPI – Do You Lilac It? This lavender shade from OPI is slightly brighter, but still soft and gentle. OPI is famous for long-lasting nail polish that doesn’t chip easily, making it a great choice if you want your manicure to last. 3. Sally Hansen – Good. Kind. Pure. Sally Hansen’s Good. Kind. Pure. collection offers a lavender shade that is vegan and made with plant-based ingredients. It’s safe for kids and comes in a beautiful bottle, making it an eco-friendly and stylish option.   Key Features to Look For in Lavender Nail Polish When choosing the right nail polish purple colour, there are a few important features to consider. Here’s a quick look at what to keep in mind: Feature Why It’s Important Long-lasting You want a polish that won’t chip or fade easily, so your nails stay perfect longer. Smooth Application A smooth formula makes it easy to apply without streaks or bubbles. Vegan/Non-toxic For kids, it’s important to pick nail polish that is safe and free from harmful chemicals. Quick-dry Nobody likes waiting for their nails to dry! Quick-dry formulas save time and effort. Shine A nice shiny finish makes your nails look polished and professional. Color Vibrancy You want the lavender to look bright and true to the bottle shade. Easy Removal Choose a nail polish that can be easily removed without needing harsh chemicals. Affordable Finding a good polish that doesn’t cost too much is always a bonus.   Subtle Nail Art with Lavender   Lavender nail polish is a wonderful base for creating fun and subtle nail art. Here are some ideas for making your lavender nails stand out: 1. Lavender with Silver Glitter One of the easiest ways to add sparkle to your nails is by applying a silver glitter top coat over your lavender polish. The glitter adds a fun shine without taking away from the soft lavender color. 2. Floral Designs Lavender and flowers go hand-in-hand. You can add small flower designs on top of your lavender nails for a cute, springtime look. You can use white, pink, or yellow polish to create tiny flowers. 3. Lavender Ombre An ombre look is when two colors blend into each other. For a lavender ombre, you can mix lavender with a light pink or white polish for a beautiful, soft gradient effect on your nails.   How to Apply Lavender Nail Polish for a Perfect Look Now that you know which lavender polishes to choose and some design ideas, here’s a simple guide to applying nail polish purple colour perfectly: Step 1: Prep Your Nails Start by cleaning your nails and making sure they’re dry. Trim and file them into your desired shape. Don’t forget to push back your cuticles for a neat look. Step 2: Apply a Base Coat Always use a base coat before applying nail polish. It helps the color stick better and protects your nails from staining. Step 3: Apply the Lavender Nail Polish Now, it’s time for the lavender polish! Apply a thin layer of polish and let it dry. Once it’s dry, add a second layer for a more opaque color. Step 4: Add a Top Coat To make your lavender nails last longer, finish with a clear top coat. This will give your nails a shiny finish and protect the polish from chipping. Step 5: Clean Up Use a small brush or a cotton swab dipped in nail polish remover to clean up any polish that may have gotten on your skin.   5 Fun Facts About Lavender Nail Polish Relaxing Color: Lavender is known for its calming effect. Wearing light lavender nail polish might help you feel more relaxed throughout the day. Seasonal Favorite: Lavender is a popular color for spring and summer, but it can be worn all year round. Goes with Anything: Lavender is a neutral yet fun color, making it easy to match with a variety of outfits. Soft but Stylish: While lavender is a soft color, it still makes a bold fashion statement. Great

Puppy Nail Polish
Nail Polish

Puppy Nail Polish: A Fun Guide for Kids!

Introduction to Puppy Nail Polish Have you ever looked at your puppy’s cute little paws and thought, “What if I could make them even cuter?” Well, now you can with puppy nail polish! That’s right—just like you can paint your own nails, there’s a safe and fun way to paint your puppy’s nails, too. Turquoise nail polish is made with special ingredients that won’t hurt your furry friend. It’s perfect for adding a little sparkle and style to their paws, especially for special events or just to match your own nails. This guide will walk you through everything you need to know about teal nail polish in a fun and simple way! But before you grab that nail brush, it’s important to learn the best way to use white gel nail polish. We’ll also talk about the most exciting colors, tips for keeping your pup calm, and much more. So, let’s get started on this pawsome adventure!   Why Puppy Nail Polish is Safe and Fun! You might be wondering, “Is it really okay to paint my puppy’s nails?” The answer is yes, as long as you use special puppy-safe nail polish! This type of nail polish is made without harmful chemicals, so it won’t hurt your puppy. It’s important to never use regular human nail polish on your pup because those can be dangerous. Puppy nail polish is designed to be safe, non-toxic, and often even comes in fun, bright colors. You can even find sparkly or glow-in-the-dark options! Plus, painting your puppy’s nails can be a fun bonding activity. Imagine matching your own nails with your puppy’s! It’s a great way to show off your pup’s personality and style, and it can be done safely if you follow a few easy steps.   How to Choose the Best Puppy Nail Polish When choosing the perfect nail polish for your puppy, there are a few things to keep in mind. First, always make sure the polish says it’s “puppy-safe” on the label. This means it doesn’t have harmful ingredients. Next, think about the colors! Does your puppy like bright colors like red, or maybe something softer like baby pink? Here are some popular puppy nail polish colors: Pink: Perfect for a girly look. Blue: Fun for any adventurous puppy. Purple: A magical choice for those who love to stand out. Sparkly Silver: Great for parties and special events! And don’t forget, if your puppy doesn’t like sitting still for long, choose a quick-drying polish so the job gets done faster.   Product Information: What’s in Puppy Nail Polish? Now that we know teal nail polish is fun and safe, let’s talk about what it’s made of. Turquoise nail polish is usually water-based, meaning it’s easy to wash off if needed. It doesn’t contain strong-smelling chemicals, which is really important because puppies have sensitive noses. Some even come with vitamins to help keep your puppy’s nails healthy. Others are peelable, meaning you can just peel the polish off when it’s time to switch colors!   Key Features of Puppy Nail Polish Here’s a quick look at some important features of the best turquoise nail polish products: Feature Description Non-toxic formula Safe for your puppy’s nails and skin. Water-based Easy to wash off if needed, safe for puppies to lick. Quick-drying Dries fast, so your puppy can get back to playing quickly. Fun colors Comes in a variety of exciting colors like pink, blue, and purple. Peelable options Can be peeled off, no need for harsh removers. Vitamins for nails Some polishes contain vitamins to keep nails strong and healthy. Odorless No strong smells, great for puppies with sensitive noses. Easy to apply Designed to go on smoothly and quickly.   How to Apply Puppy Nail Polish Safely Let’s dive into how to give your puppy the best nail painting experience! First, make sure your puppy is calm and comfortable. You might want to have treats nearby to reward them for sitting still. Next, trim your puppy’s nails if they are too long—just like you would with your own nails before painting. Once the nails are ready, follow these steps: Pick a color: Choose the nail polish color you love the most! Apply carefully: Gently brush the polish onto each nail. Don’t worry if your puppy wiggles a bit—just take your time. Wait for it to dry: Most teal nail polish dry quickly, but make sure your puppy doesn’t lick or run around until it’s fully dry. Give treats!: Reward your white gel nail polish for being such a good model!   Tips to Keep Your Puppy Calm While Painting Not all puppies love sitting still, especially when you’re doing something as new as painting their nails. Here are some helpful tips: Start slow: Introduce your puppy to the nail polish bottle before you begin. Let them sniff it! Use treats: Keep a few yummy treats nearby to reward your puppy for good behavior. Keep it short: If your puppy gets restless, try painting one or two nails at a time. You can always finish the job later!   Fun Ideas for Puppy Nail Designs Once you’ve mastered painting your puppy’s nails, you can start getting creative! Here are a few fun ideas to try: Polka dots: Use a small brush to add cute polka dots on top of the base color. Stripes: For a sporty look, try painting tiny stripes in different colors. Glitter: Add a little sparkle to your puppy’s paws by applying a glitter topcoat! These designs are simple and can be done in minutes, making your puppy the most stylish pup at the dog park!   Best Times to Paint Your Puppy’s Nails Painting your puppy’s nails can be a fun activity for all kinds of events. Here are some perfect times to try it out: Birthday parties: Let your puppy shine on their special day! Holidays: Paint your puppy’s nails in festive colors like red for Christmas or orange for Halloween. Matching your outfit: Going

Chocolate Nail Polish
Nail Polish

Chocolate Nail Polish: The Ultimate Guide for Kids

Chocolate nail polish is a super fun and trendy way to add a touch of sweetness to your nails! Imagine painting your nails with a rich, chocolatey shade that looks just like your favorite chocolate bar. In this guide, we’ll dive into everything you need to know about raspberry nail polish, including why it’s so popular, how to choose the best one, and some fantastic nail art ideas. Plus, we’ll answer some of the most common questions kids have about cream color nail polish. So, let’s get started and make our nails look yummy!   What is Chocolate Nail Polish? sparkle gel nail polish is a special type of nail polish that comes in shades that resemble delicious chocolate. From dark, rich browns to lighter, creamy cocoa colors, chocolate nail polish is perfect for anyone who loves a sweet and stylish look. These shades are great for fall, winter, or any time you want to show off a cozy and warm vibe. Whether you like shiny, matte, or sparkly finishes, there’s a chocolate shade for everyone! And the best part? It looks fantastic on nails of all shapes and sizes, making it a perfect pick for any kid who loves to express themselves through fun and creative nail designs.   Why Kids Love Chocolate Nail Polish Kids love raspberry nail polish because it’s fun, trendy, and makes them feel stylish. It’s like wearing a little piece of candy on your nails without the sticky mess! Chocolate nail polish also pairs well with different outfits, whether you’re dressing up for a party or just hanging out with friends. Plus, it’s perfect for fall and Halloween-themed nails when you want to match the season’s cozy vibes. With so many shades available, from dark chocolate to light milk chocolate, there’s a color that’s perfect for everyone. And who doesn’t love something that reminds them of their favorite sweet treat?   Key Features of Chocolate Nail Polish Here’s a look at what makes sparkle gel nail polish so special and why it’s a must-have for your nail polish collection: Feature Description Rich Colors Comes in a variety of chocolatey shades, from dark to light. Kid-Friendly Safe and non-toxic formulas perfect for kids’ nails. Long-Lasting Stays on your nails for days without chipping easily. Quick-Drying Dries fast so you can get back to playing in no time! Easy to Apply Smooth application with no streaks or bubbles. Fun Finishes Available in glossy, matte, and even sparkly finishes. Matches Any Outfit Looks great with all outfits, from casual to fancy. Perfect for Nail Art Great for creating cute designs like dots, stripes, and more!   Different Shades of Chocolate Nail Polish Cream color nail polish comes in a variety of shades that make your nails look like delicious treats. Here are some popular shades you can try: 1. Dark Chocolate This is a deep, rich brown that looks just like a bar of dark chocolate. It’s perfect for a bold and stylish look. 2. Milk Chocolate A softer brown that resembles milk chocolate candy. It’s a great everyday color that looks good on everyone. 3. White Chocolate A creamy, off-white shade that’s sweet and subtle. It’s perfect if you want something light but still chocolatey.   How to Apply Chocolate Nail Polish Perfectly Applying raspberry nail polish is super easy! Follow these simple steps to get the perfect manicure: Clean Your Nails: Make sure your nails are clean and dry. Remove any old polish and wash your hands. Apply a Base Coat: A base coat helps the polish stick better and protects your nails. Paint Your Nails: Apply the chocolate polish in thin coats. Start with one coat, let it dry, and then add a second coat for richer color. Finish with a Top Coat: A top coat adds shine and helps your polish last longer without chipping. Let It Dry: Make sure your nails are completely dry before you touch anything to avoid smudges.   Fun Nail Art Ideas with Chocolate Nail Polish You can do so much with cream color nail polish! Here are some fun ideas: Chocolate Drip Nails: Create a chocolate dripping effect using dark brown polish. It looks just like melted chocolate! Chocolate and Gold: Mix chocolate polish with gold glitter for a glamorous and elegant look. Chocolate Sprinkle Nails: Add tiny sprinkles or glitter on top of your chocolate polish for a sweet, candy-like design.   Frequently Asked Questions (FAQs) 1. Is chocolate nail polish safe for kids? Yes, most sparkle gel nail polish are made with kid-friendly, non-toxic ingredients. Always check the label to make sure it’s safe for children. 2. How long does chocolate polish last? Chocolate nail can last up to a week if applied properly with a base and top coat. Avoiding activities that cause chipping can help it last longer. 3. Can I wear cream color nail polish to school? Yes! Chocolate nail polish is usually subtle enough to wear to school, but it’s always a good idea to check your school’s rules on nail polish first. 4. How do I remove chocolate nail polish? Use a gentle nail polish remover to take off your raspberry nail polish. Soak a cotton ball with remover, press it on your nail, and swipe away the polish. 5. What outfits go best with chocolate nail polish? Chocolate polish looks great with warm colors like orange, yellow, and red. It’s also perfect for matching with fall and winter outfits.   Conclusion Chocolate nail polish is the perfect way to add a sweet and stylish touch to your nails. With so many shades and fun nail art possibilities, it’s easy to see why kids love it. Whether you’re rocking dark chocolate nails for a bold look or soft milk chocolate for something sweet, this polish is a great way to express your unique style. Now that you know all about cream color nail polish, it’s time to pick your favorite shade and start painting! Have fun creating your own

Electric Blue Nail Polish
Nail Polish

Electric Blue Nail Polish: A Splash of Fun for Your Fingertips!

Introduction Well, Electric blue nail polish is like a bolt of lightning on your nails. [It’s bright, fun, and perfect for anyone who loves to stand out.] Whether you’re getting ready for a party or just want to add a pop of color to your everyday look, electric blue nails are sure to catch everyone’s eye. In this guide, we’ll dive into everything you need to know about fuchsia nail polish. [From the best products to try, to some cool design ideas, and even answering your most burning questions.] Get ready to make your nails shine like never before!   Why Choose Electric Blue Nail Polish? Electric blue is a bold choice. [But why should you pick it?] First off, it’s unique. [Unlike the classic reds or pinks, electric blue offers something different and exciting.] It’s a color that screams confidence and creativity. This shade is also super versatile. [You can wear it during any season, and it looks great on nails of all shapes and lengths.] Plus, blue green nail polish can be paired with other colors for a fun, mixed look. Whether you’re into glitter, matte, or shiny finishes, glow in dark nail polish is a winner.   Best Electric Blue Nail Polish to Try Now, let’s talk about some of the best fuchsia nail polish you can get your hands on. [Here are a few top picks that will make your nails pop.] Sally Hansen Miracle Gel – Electric Pop Sally Hansen is known for its long-lasting nail polishes. [The Miracle Gel in “Electric Pop” is no exception.] This shade is vibrant and gives your nails a smooth, glossy finish. It’s also chip-resistant, so your nails will look fresh for days. Essie Nail Polish – Butler Please Essie is a beloved brand for a reason. [Their “Butler Please” is a stunning electric blue that’s easy to apply.] The polish is rich in color and has a shiny finish that will make your nails gleam in the light. OPI Nail Lacquer – Blue My Mind OPI’s “blue green nail polish My Mind” is another fantastic choice. [This shade is a bit darker but still has that electric vibe.] It’s perfect if you want a bold look that’s not too bright. The polish is smooth, easy to apply, and lasts a long time. Zoya Nail Polish – Neve Of Electric Blue Nail Polish If you’re looking for a more sophisticated electric blue, Zoya’s “Neve” is the one for you. [It has a slight shimmer that adds a touch of elegance to your nails.] Zoya is also known for its long-lasting formula, so you won’t have to worry about chips. China Glaze Nail Lacquer – Frostbite China Glaze’s “Frostbite” is a striking electric blue with a frosty finish. [This polish is perfect for anyone who loves a little shimmer.] It’s bold, bright, and guaranteed to turn heads.   Key Features Of Electric Blue Nail Polish When choosing an glow in dark nail polish, there are a few key features to look for. [Let’s take a closer look at what makes these products stand out.] Product Finish Longevity Chip-Resistant Special Features Sally Hansen Miracle Gel Glossy 10+ days Yes Requires no UV light Essie Nail Polish “Butler Please” Shiny 7+ days Yes Quick-dry formula OPI Nail Lacquer “Blue My Mind” Glossy 7+ days Yes Rich color in one coat Zoya Nail Polish “Neve” Shimmery 10+ days Yes Vegan and toxin-free China Glaze Nail Lacquer “Frostbite” Frosty 7+ days Yes High shimmer   How to Apply Electric Blue Nail Polish Like a Pro Applying fuchsia nail polish is easy, but there are a few tips to make sure it looks flawless. [Here’s a simple step-by-step guide to help you out.] Start with Clean Nails: [Make sure your nails are clean and dry before applying any polish.] This helps the polish stick better and last longer. Use a Base Coat: [A base coat is super important.] It protects your nails from staining and makes the polish last longer. Apply Thin Coats: [When applying glow in dark nail polish, start with thin coats.] This helps prevent streaks and makes the color more vibrant. Let It Dry: [Be patient and let each coat dry before applying the next one.] This will prevent smudging and give you a smooth finish. Finish with a Top Coat: [A top coat adds shine and protects your polish from chipping.] It’s the secret to making your manicure last longer.   Electric Blue Nail Polish Design Ideas Electric blue is a fun color to play with. [You can create so many cool nail designs using this shade.] Here are a few ideas to inspire you: 1. Electric Blue French Tips: Give the classic French manicure a twist by using electric blue for the tips instead of white. [It’s a simple but striking design that’s perfect for any occasion.] 2. Electric Blue Ombre Of Electric Blue Nail Polish: Create an ombre effect by blending electric blue with a lighter shade. [Start with a white or light blue base and gradually blend in the electric blue for a stunning gradient effect.] 3. Electric Blue with Glitter: Add some sparkle to your electric blue nails by applying a layer of glitter polish on top. [This design is perfect for parties or when you want your nails to shine even more.] 4. Electric Blue and Silver Stripes: Combine electric blue with silver stripes for a chic, modern look. [Use nail tape to create clean lines and make your nails look like a work of art.] 5. Electric Blue with Rhinestones: For a glamorous touch, add rhinestones to your electric blue nails. [Place them at the base of your nails or create a pattern for a dazzling effect.]   Taking Care of Your Electric Blue Nail Polish Once your nails are painted and looking fabulous, it’s important to take care of them. [Here are some tips to keep your electric blue nails looking fresh and fabulous.] 1. Moisturize Your Cuticles: Dry cuticles can ruin the

White Bunny Nail Polish
Nail Polish

White Bunny Nail Polish: A Fun and Easy Guide for Kids

Introduction White Bunny Nail Polish is the cutest way to make your nails look awesome! It’s like painting your nails with fluffy bunny magic that’s perfect for kids who love bunnies, soft colors, and having fun with their nails. Whether you’re getting ready for a special day or just want to add a little sparkle to your everyday look, this nail polish is your new best friend. But what makes funny bunny nail polish gel so special? Well, it’s not just about the color. It’s about the whole experience! Imagine opening a bottle and finding the perfect, gentle white color that reminds you of a sweet little bunny hopping around in the snow. [. ] And the best part? It’s super easy to apply, dries quickly, and looks beautiful on every little hand. Let’s hop into this exciting world of glow in dark nail polish and explore all the amazing things it has to offer! We’ll talk about what makes this nail polish so cool, share some fun ideas for how to use it, and answer some questions you might have. Ready to make your nails look bunny-tastic? Let’s get started!   What Makes White Bunny Nail Polish So Special? Glow in dark nail polish isn’t just any nail polish. It’s like a little bottle of happiness! It has a soft, smooth texture that glides on your nails like magic. The color is a soft white, just like a fluffy bunny, and it’s perfect for kids who want to have pretty nails without being too flashy.   Easy to Apply One of the best things about White Bunny Nail Polish is how easy it is to put on. The brush is made just for little hands, so you won’t have any trouble getting the color exactly where you want it. [. ] Plus, the polish is designed to dry quickly, so you won’t have to sit still for too long.   Long-Lasting Fun Of White Bunny Nail Polish Once you’ve painted your nails, the fun doesn’t stop! White Nail Polish is made to last, so you can enjoy your pretty nails for days. [.] Whether you’re playing, drawing, or even helping in the kitchen, your nails will stay beautiful.   Safe and Gentle Safety is super important, especially when it comes to kids. Sparkling white nail polish is made with safe, gentle ingredients that are kind to your nails and skin. [. ] It’s free from harsh chemicals, so moms and dads can feel good about letting you use it.   Key Features of White Bunny Nail Polish Let’s take a closer look at some of the key features that make funny bunny nail polish gel the best choice for kids: Feature Description Soft White Color A gentle, bunny-like white that’s perfect for every occasion. Kid-Friendly Brush Specially designed for little hands to make application easy and fun. Quick-Dry Formula No long waits! Your nails will be dry and ready to go in no time. Long-Lasting Wear Enjoy your pretty nails for days without worrying about chipping. Safe Ingredients Made without harsh chemicals, so it’s gentle on your nails and skin. Smooth Texture Glides on easily, making it perfect for kids to use on their own. Easy to Remove When you’re ready for a change, it comes off easily without leaving stains. Cute Packaging Comes in a fun, bunny-themed bottle that looks great on your dresser.   How to Use White Bunny Nail Polish Using sparkling white nail polish is super easy! Here’s a step-by-step guide to help you get the most out of your nail-painting adventure. Step 1: Prepare Your Nails Before you start, make sure your nails are clean and dry. You can wash your hands with soap and water, then gently dry them with a towel. [. ] If your nails are a bit long, ask an adult to help you trim them so they’re neat and tidy. Step 2: Shake the Bottle Of White Bunny Nail Polish Gently shake the bottle of White Polish to make sure the color is mixed well. [. ] This will help you get the best color when you start painting. Step 3: Apply the Polish Open the bottle and carefully take out the brush. [. ] Wipe off any extra polish on the edge of the bottle so it doesn’t drip. [. ] Now, start painting your nails! Begin with the middle of your nail, then do the sides. [. ] Try to keep your hand steady for the best results. Step 4: Let It Dry After you’ve painted all your nails, it’s time to let them dry. [. ] Find a comfy spot where you can sit and relax for a few minutes. [. ] Remember, the polish dries quickly, so you won’t have to wait too long! Step 5: Show Off Your Nails Once your nails are dry, you’re ready to show them off! [. ] Whether you’re going to school, a friend’s house, or just playing at home, your bunny-white nails will look amazing.   Fun Ideas for Decorating Your White Bunny Nail Polish White Bunny Nails is great on its own, but you can also get creative and add some extra fun to your nails! Here are some cool ideas to try: Add Stickers You can find all kinds of tiny stickers that are perfect for decorating your nails. [. ] From stars to hearts to little animals, there’s a sticker for everyone! Just stick them on after your polish is dry, and you’re good to go. Glitter It Up If you love sparkle, try adding a little glitter to your nails. [. ] You can sprinkle it on while the polish is still wet, or use a glitter topcoat for a sparkly finish. Mix and Match Why not try painting some of your nails with White Bunny Nail Polish and others with a different color? [. ] You can mix and match to create a fun, colorful look that’s all your own. Create Patterns

Mint Green Nail Polish
Nail Polish

Mint Green Nail Polish: A Kid-Friendly Guide to Stylish Nails

Introduction to Mint Green Nail Polish Mint green nail polish is a fresh and fun way to add a pop of color to your nails. It’s a light and soft shade of green that looks amazing on any skin tone. Perfect for kids and adults alike, mint green nails can make you feel cool, calm, and stylish all at once. In this article, we’ll explore everything about mint green nail polish. We’ll talk about why it’s so popular, how to wear it, and some cool designs you can try. Plus, we’ll answer some of your most asked questions and share the best mint green nail polishes out there!   Why Mint Green? Mint green is a popular color because it’s calm, fresh, and reminds us of nature. It’s a color that makes you think of minty candies, cool breezes, and happy vibes. Wearing mint green on your nails is like carrying a little bit of happiness with you wherever you go. Kids love it because it’s bright but not too loud, making it perfect for any occasion.   Best Mint Green Nail Polishes for Kids Finding the perfect mint green nail polish can be super fun! Here are some of the best options that are safe, easy to apply, and perfect for kids.   1. Sparkly Mint Magic This polish is a light mint green with a touch of sparkle. It shines in the sun and looks like a magical minty treat on your nails. Perfect for parties or any day you want to feel a bit extra special.   2. Soft Mint Gel Polish A soft and smooth mint green polish that lasts long and feels soft on your nails. Great for those who want their nails to look polished and pretty without too much effort. It’s also easy to remove, making it perfect for kids!   3. Quick Dry Mint Splash If you’re always on the go, this quick-drying mint polish is your best friend. Just swipe it on, and it dries super fast! Perfect for busy kids who love to have colorful nails but don’t want to wait around.   4. Minty Fresh Matte Polish This one gives your nails a matte finish, which means no shine, just a smooth mint color. It looks super trendy and is great for a modern, cool look. Perfect for school or playdates!   Key Features of Mint Green Nail Polishes Product Name Finish Dry Time Kid-Friendly Special Feature Sparkly Mint Magic Shimmery Fast Yes Adds sparkle to nails Soft Mint Gel Polish Glossy Medium Yes Long-lasting, easy to remove Quick Dry Mint Splash Glossy Very Fast Yes Dries quickly, no wait time Minty Fresh Matte Matte Medium Yes Modern matte finish Cool Mint Pop Glossy Fast Yes Bold color, smooth finish Mint Glow in the Dark Glow Medium Yes Glows in the dark, fun at night Mint Dream Pastel Pastel Gloss Slow Yes Soft, dreamy pastel finish Minty Sparkles Gel Glitter Gel Medium Yes Gel finish with glitter sparkles   How to Apply Mint Green Nail Polish Like a Pro Applying nail polish can be fun and easy with a little practice. Here’s a simple step-by-step guide to help you get that perfect minty look!   Step 1: Clean Your Nails Start with clean, dry nails. Wash your hands with soap and water, and make sure your nails are free of old polish.   Step 2: Apply a Base Coat A base coat helps protect your nails and makes the polish last longer. Apply a thin layer and let it dry completely.   Step 3: Paint with Mint Green Polish Now comes the fun part! Apply a thin layer of your mint green polish. Start in the middle of your nail and work your way to the sides. Let it dry for a few minutes, then add a second coat for a bolder color.   Step 4: Add a Top Coat A top coat will make your polish shine and help it last longer without chipping. It’s like adding a shiny shield to your nails!   Creative Mint Green Nail Designs If you love mint green, you’ll adore these fun and simple designs. These ideas are perfect for kids and can be done right at home!   1. Minty Polka Dots Use a white nail pen to add tiny dots on your mint green nails. It’s cute, playful, and easy to do!   2. Mint with Silver Tips Add a shiny silver line to the tips of your mint green nails for a classy look. It’s like adding a bit of magic sparkle to your nails!   3. Mint and Pink Combo Alternate between mint green and soft pink polish for a sweet and stylish look. This combo looks like candy on your nails!   FAQs About Mint Green Nail Polish Q1: Is mint green nail polish safe for kids? Yes, most mint green nail polishes are safe for kids, especially those that are water-based or labeled as kid-friendly. Always check the label for non-toxic ingredients! Q2: How do I make my mint green polish last longer? Using a base coat and a top coat can help your mint green polish last longer. Also, avoid using your nails as tools, and keep them dry as much as possible. Q3: Can I mix mint green with other colors? Absolutely! Mint green looks great with white, pink, silver, and even gold. You can create lots of fun designs by mixing and matching colors. Q4: How do I remove mint green nail polish easily? Use a gentle nail polish remover that is safe for kids. Soak a cotton ball in the remover, press it on your nail, and swipe off the polish. Q5: Can I use mint green polish for special events? Yes, mint green is perfect for special events like birthday parties, holidays, and more. It’s a versatile color that can be dressed up or down.   Conclusion: Mint Green Nails for the Win! Mint green nail polish is a fantastic

Red Glitter Nail Polish
Nail Polish

Red Glitter Nail Polish Sparkle and Shine: A Fun Guide

Introduction Welcome to the world of red glitter nail polish, where fun and sparkle come together to make your nails look fabulous! If you love shiny things and want to add a touch of magic to your nails, then blood red nail polish is perfect for you. In this guide, we’ll explore everything you need to know about orange red nail polish. From why it’s so much fun to wear, to how to choose the best one, and even some cool tips for applying it like a pro. Let’s dive into this glittery adventure and discover how to make your nails sparkle and shine!   What is Red Glitter Nail Polish? Red gel nail polish is a special type of nail polish that combines the boldness of red with the sparkle of glitter. It’s like having a tiny party on your nails! This polish comes in various shades of red and has lots of tiny, shiny glitter pieces mixed in. When you apply it, your nails will look dazzling and catch the light in the most magical way. It’s perfect for special occasions, holidays, or whenever you want to add a bit of sparkle to your day.   Product Information Of Red Glitter Nail Polish Red nail polish is not just about looking pretty—it also comes with some cool features. Here’s a quick look at what you can expect: Shade Variety: You can find red glitter nail polish in many different shades, from bright cherry red to deep crimson. Each shade can give you a different look, so you can pick the one that matches your mood or outfit. Glitter Size: The glitter in the polish can vary in size. Some have fine glitter that gives a subtle shine, while others have chunky glitter for a bolder, more dramatic effect. Longevity: Many blood red nail polish are long-lasting, so you don’t have to worry about them chipping quickly. They often stay looking fresh for several days.   Key Features Of Red Glitter Nail Polish Here’s a table with some key features of red glitter polish to help you choose the best one: Feature Description Shade Variety Different shades of red available Glitter Size Fine, medium, or chunky glitter pieces Longevity Long-lasting formula Application Easy-to-apply brush for smooth coverage Drying Time Quick-drying for fast results Removal Easy to remove with nail polish remover Finish Shiny and sparkling effect Price Available at different price points   How to Apply Red Glitter Nail Polish Applying red gel nail polish is easy and fun! Here’s a step-by-step guide to help you get the perfect sparkle on your nails: 1. Prepare Your Nails Start by making sure your nails are clean and dry. Remove any old nail polish and wash your hands. You might also want to apply a base coat to protect your nails and help the polish stick better. 2. Apply the Base Coat A base coat helps your nail polish last longer and prevents staining. Apply a thin layer of base coat and let it dry completely before moving on to the next step. 3. Apply Red Glitter Nail Polish Shake the bottle of blood red nail polish well before applying. Brush a thin layer of polish onto your nails, starting from the base and moving towards the tip. Make sure to cover the entire nail evenly. You might need to apply a second coat for extra sparkle. 4. Let It Dry Allow the polish to dry completely. This might take a few minutes, so be patient. You can use a quick-dry top coat to speed up the drying process if you like. 5. Apply a Top Coat A top coat will help seal the glitter polish and give your nails a smooth finish. It also adds extra shine and helps prevent chipping. Apply a thin layer of top coat and let it dry.   Fun Ways to Use Red Glitter Nail Polish Orange red nail polish isn’t just for special occasions—it can be used in many fun ways! Here are some ideas: 1. Holiday Looks Red nail polish is perfect for holiday celebrations. Whether it’s Christmas, Valentine’s Day, or New Year’s Eve, your nails will look festive and fun. 2. Party Glam Of Red Glitter Nail Polish Heading to a party? Add some red glitter to your nails for a glamorous touch. It will make your hands sparkle as you dance the night away. 3. Everyday Sparkle Why wait for a special occasion? Wear red nail polish any day you want to brighten up your look. It’s a great way to add a bit of cheer to your everyday outfits. 4. Creative Designs Get creative with your nail art! You can use red gel nail polish as an accent or create fun designs by combining it with other colors. Try dots, stripes, or even a glitter gradient.   FAQs About Red Glitter Nail Polish 1. How do I remove blood red nail polish? Removing red glitter nail polish can be a bit tricky because of the glitter. Use a nail polish remover with acetone for best results. Soak a cotton pad in the remover and press it onto your nails for a few seconds before wiping it away. 2. Can I use orange red nail polish on top of other colors? Absolutely! Red glitter nail polish looks great over other colors. Try it on top of a base color like white or black to make the glitter really pop. You can also use it for fun nail art designs. 3. How long does orange red nail polish last? Red glitter nail polish is known for its long-lasting formula. With a good base coat and top coat, it can last for several days without chipping. Just be sure to apply it carefully for the best results. 4. Is red gel nail polish suitable for kids? Yes, red glitter nail polish can be suitable for kids, but make sure to choose a formula that’s safe and non-toxic. It’s always a good idea

Neon Nail Polish
Nail Polish

Neon Nail Polish: The Ultimate Guide for Kids

Neon nail polish is a fun and trendy way to make your nails pop with bright, glowing colors. Whether you’re getting ready for a party, hanging out with friends, or just want to add a splash of color to your everyday look, neon pink nail polish is perfect! This guide will tell you all about pink glitter nail polish, how to choose the best one, and some cool designs you can try at home. Let’s dive in!   What is Neon Nail Polish? Puppy nail polish is a type of nail paint that glows with super bright colors. These colors are usually super vibrant, like hot pink, electric blue, bright green, and sunny yellow. Neon polishes often have a special formula that makes them shine under UV light, which is why they look amazing at parties or places with black lights. Neon nails are not just for grown-ups; kids can have fun with them too! They’re great for sleepovers, playdates, or just because you love bright colors.   Why Choose Neon Nail Polish? Choosing puppy nail polish is like adding a burst of happiness to your nails. Neon colors make your hands look lively and fun, and they can match any outfit. Whether it’s summer or winter, neon pink nail polish brings a splash of sunshine to your style. Plus, you can mix and match different neon colors to create your unique look!   Types of Neon Nail Polish Pink glitter nail polish come in many forms. Some are shiny, some are matte, and some even have sparkles! Here are a few types you can find: Glossy Neon Polishes: These are bright and shiny, perfect for those who love a classic, polished look. Matte Neon Polishes: For a more modern and sleek look, matte neon polishes are great because they don’t have a shiny finish. Glitter Neon Polishes: If you love sparkles, glitter puppy nail polish add that extra shine with tiny glitter pieces mixed in. Gel Neon Polishes: These last longer and often look more vibrant, but they usually need a UV lamp to dry.   Key Features of Neon Nail Polishes Below are some key features of neon pink nail polish. Feature Description Vibrant Colors Neon polishes are known for their bold, bright shades that stand out. Long-Lasting Many neon polishes are designed to last longer without chipping. Easy Application Most neon polishes come with a smooth brush that makes it easy to apply. Fast Drying Neon nail polishes often dry quickly, which is perfect for kids on the go. UV Reactive Some neon polishes glow under UV light, making them great for parties. Safe for Kids Many brands offer non-toxic formulas that are safe for kids’ nails. Fun Designs You can create fun nail art with neon polishes, like stripes, dots, or even tiny hearts. Variety of Finishes Available in glossy, matte, or glittery finishes to suit your mood and style.   How to Apply Neon Nail Polish Applying puppy nail polish is super easy! Here’s how you can do it at home: Start with Clean Nails: Make sure your nails are clean and dry. You can use a little bit of nail polish remover to get rid of any old polish or oils. Apply a Base Coat: This step is important to protect your nails and make the polish last longer. Shake the Bottle: Give your pink glitter nail polish a good shake to mix the color evenly. Apply the Neon Polish: Paint your nails with your favorite neon color. You might need two coats to make the color really pop. Let It Dry: Allow the polish to dry completely before doing anything with your hands. Add a Top Coat: A top coat will seal in your neon polish and make it last even longer.   Fun Neon Nail Designs for Kids Neon nail polish isn’t just about painting your nails one color. You can get super creative and try fun designs! Here are some ideas: 1. Rainbow Neon Nails Paint each nail a different neon color to create a fun rainbow effect. 2. Neon Polka Dots Use a toothpick or a dotting tool to create cute dots on your nails in different neon colors. 3. Stripes and Lines Use nail tape to create straight lines on your nails, then fill them in with different neon colors. 4. Neon Hearts Paint tiny hearts on your nails using a small brush or a toothpick. 5. Neon French Tips Instead of a classic white tip, use neon colors for a modern twist on the French manicure.   Benefits of Using Neon Nail Polish Using neon pink nail polish comes with so many fun benefits! Bright and Fun: It’s the perfect way to add some excitement to your nails. Perfect for Parties: Neon nails glow under UV light, making them great for parties. Easy to Match: Neon colors go with almost any outfit, especially casual and summer styles. Express Yourself: You can mix, match, and create designs that show off your personality.   Tips to Make Your Neon Nail Polish Last Longer To keep your neon nails looking fresh and bright, try these tips: Always Use a Base and Top Coat: These help protect the color and keep it from chipping. Avoid Water for a While: Water can make your polish chip faster, so try to keep your nails dry for at least an hour after painting. Touch Up: If you see a chip, touch it up quickly to keep your nails looking fresh.   Frequently Asked Questions (FAQs) 1. Is neon nail polish safe for kids? Yes, many pink glitter nail polish are made with non-toxic ingredients that are safe for kids. Always check the label to ensure it’s free from harmful chemicals like formaldehyde and toluene. 2. How can I remove neon nail polish easily? Neon nail polish can be removed just like regular nail polish. Use a nail polish remover and a cotton pad, and gently rub until the polish comes off. 3. Can I

Nail Polish Thinner
Nail Polish

Nail Polish Thinner: Everything You Need to Know

Introduction Nail Polish Thinner is like magic for your old nail polishes! It helps make thick or gloopy nail polish smooth and easy to use again. Imagine having a favorite color that’s all sticky, and you can’t use it anymore. That’s when nail polish and glitter comes to the rescue. This little bottle helps your nail polish go back to being perfect just like new! If you’ve ever wondered how to save your favorite nail polish, keep reading because this guide will tell you everything in a fun, kid-friendly way. Let’s dive into the world of neon nail polish and see how they work.   What is Nail Polish Thinner? Clear gel nail polish is a special liquid made to fix thick, clumpy nail polish. When nail polish sits for too long or is not tightly sealed, it can become thick and hard to apply. Nail polish thinner adds back the ingredients that have evaporated over time. It helps make the polish smooth and easy to use again. Just a few drops can make a big difference!   How Does Nail Polish Thinner Work? Nail polish and glitter contains ingredients like ethyl acetate and butyl acetate, which are also found in nail polish. These ingredients help break down the thick polish and mix it evenly. When you add thinner to your nail polish bottle, it blends everything, making the polish thin and smooth. This means your polish will spread nicely on your nails without any bumps or lumps.   Why Do You Need Nail Polish Thinner? Neon nail polish is super helpful if you love doing your nails. Here are some reasons why you need it: Saves Money: Instead of throwing away old nail polish, you can use a thinner to bring it back to life. Perfect Application: Thinner makes the polish smooth, so it glides easily on your nails. Extends Shelf Life: It keeps your favorite colors fresh and usable for a long time. Reduces Waste: Helps you use every last drop of your nail polish.   Key Features of Nail Polish Thinner Here’s a look at what makes nail polish and glitter a must-have: Feature Details Easy to Use Just add a few drops into your nail polish bottle, shake well, and you’re good to go! Works with All Brands Compatible with almost any brand of nail polish, so you don’t have to worry about it not working. Saves Money No need to buy new polishes when old ones get thick. Thinner helps you save money by reviving your existing bottles. Quick Results You don’t have to wait long; your polish will be back to normal in no time. Safe Ingredients Made with ingredients commonly found in nail polish, so it’s safe to use. Reduces Waste Helps you use up every bit of your nail polish, reducing the waste of throwing away half-used bottles. Portable Size Comes in a small bottle that you can carry anywhere, perfect for quick fixes on the go. Versatile Use Can be used for regular nail polish, gel polish, and even some types of top coats, making it a great addition to any nail care routine.   How to Use Nail Polish Thinner Using clear gel nail polish is easy and fun! Here’s how to do it: Shake Your Nail Polish Bottle: Before adding thinner, shake the nail polish bottle to see if it gets any better. Sometimes shaking alone can help. Add Thinner: Open your nail polish and add 2-3 drops of thinner using the dropper. Shake Well: Close the bottle and shake it really well. This helps mix the thinner and polish together. Test on Your Nails: Try painting one nail to see if the polish is smooth. If it’s still thick, add another drop of thinner. Store Properly: Always close your nail polish tightly to keep it from thickening again.   How Much Thinner Should You Use? It’s important not to add too much thinner at once. Start with just a couple of drops. If you add too much, your polish can become too watery and lose its color. A little goes a long way, so always start small and add more if needed.   Best Nail Polish Thinner Products There are many clear gel nail polish available, and each one works great. Here are some popular options: Sech Restore Thinner: Known for fixing even the thickest polishes. OPI Nail Lacquer Thinner: Perfect for OPI nail polish lovers. Beauty Secrets neon nail polish: Affordable and works with most brands. Orlay nail polish and glitter: A trusted brand known for reviving old polishes quickly.   What Not to Use as a Thinner Never use nail polish remover to thin your polish. It might seem like a good idea, but it will actually ruin the formula of your nail polish. Remover breaks down the polish instead of restoring it, making it less shiny and smooth.   FAQs About Nail Polish Thinner 1. Can I use clear gel nail polish on gel polish? Yes, but check the bottle instructions first. Not all thinners work with gel polish, so it’s best to use a thinner specifically made for gel. 2. How often can I use nail polish thinner? Only use it when your nail polish becomes thick. Using thinner too often can alter the color and consistency of your polish. 3. Does neon nail polish change the color of my polish? If used in the right amount, it won’t change the color. Adding too much can dilute the pigment, making the color lighter. 4. Is nail polish thinner safe for kids to use? Yes, but always under adult supervision. Nail polish and glitter contains chemicals that should be handled with care. 5. What if my polish is still thick after using thinner? Try adding a couple more drops. If it’s still thick, the polish might be too old and beyond saving.   Conclusion Nail polish thinner is a game-changer for anyone who loves painting their nails. It saves money, extends the life of

Silver Nail Polish
Nail Polish

Silver Nail Polish: A Shiny and Fun Guide for Kids

Introduction Silver nail polish is super cool. It’s shiny, sparkly, and makes your nails look like little jewels. This fun polish is great for everyone, from kids to adults, who love to add some shine to their style. Whether you’re dressing up for a special event or just having fun with friends, silver colour nail polish is a perfect pick. It’s like having a bit of magic on your fingertips. In this guide, we’ll talk about what makes metalic nail polish so awesome, the best features to look for, and how you can make your nails look amazing with it.   Why Silver Nail Polish is So Cool Emerald green nail polish is not just any regular nail color; it’s special. This polish stands out because it’s bright, metallic, and can make your hands sparkle. Kids love it because it’s shiny and makes them feel like they have tiny treasures on their nails. Silver goes well with almost any outfit, and it’s perfect for parties, holidays, or just a fun day out. You can wear it alone for a simple yet eye-catching look or mix it with other colors to make creative designs. Plus, silver nail polish is great because it doesn’t have to be too flashy unless you want it to be. You can keep it simple and elegant or go all out with glitter and shine.   Product Information: Types of Silver Nail Polish There are different types of metalic nail polish you can choose from. Some are shiny and smooth, while others are packed with glitter. Here’s a closer look at some popular types: Metallic Silver: This type is smooth and shiny, almost like liquid silver on your nails. It’s great for a sleek, modern look. Glitter Silver: If you love sparkles, this is the one for you. It’s packed with tiny glitter pieces that catch the light and make your nails shine bright. Holographic Silver: This type changes colors when you move your hands. It reflects different shades like pink, blue, and green, adding a rainbow effect. Matte Silver: For those who prefer a soft and subtle shine, matte silver gives a smooth finish without the gloss. It’s stylish and a bit different. Chrome Silver: This type looks like mirror silver. It’s super reflective and perfect if you want a bold and standout style.   Key Features of Silver Nail Polish (Table Form) Feature Description High Shine Gives a bright, shiny look that catches the light. Long-Lasting Stays on nails without chipping for days. Easy Application Smooth formula makes it easy to apply without mess. Quick Dry Dries quickly, so you don’t have to wait long. Non-Toxic Safe for kids with no harmful chemicals. Variety of Finishes Choose from glitter, matte, holographic, and more. Kid-Friendly Fun colors and easy to remove when needed. Affordable Available in different price ranges to suit everyone.   How to Apply Silver Nail Polish Perfectly Applying emerald green nail polish is easy, but you can follow a few tips to make it look perfect every time: Clean Your Nails: Make sure your nails are clean and dry before you start. This helps the polish stick better. Use a Base Coat: A clear base coat helps protect your nails and makes the silver polish last longer. Apply Thin Coats: Instead of one thick layer, apply two thin coats of polish. This helps it dry faster and looks smoother. Seal with Top Coat: Finish with a clear top coat to add extra shine and keep your polish looking fresh for longer. Let it Dry: Be patient and let your nails dry completely. This prevents smudges and keeps your manicure perfect.   Fun Designs with Silver Nail Polish Silver colour nail polish is not just for plain nails; you can do so much more! Here are some fun ideas: Silver Stars: Use a silver polish as a base and add tiny star stickers on top for a dreamy sky look. Silver Stripes: Paint your nails with another color and add thin silver stripes for a chic style. Glitter Tips: Paint your nails with a plain silver polish and dip the tips in glitter for an extra sparkle.   Subheadings for Extra Sparkle Best Occasions to Wear Silver Nail Polish Emerald green nail polish is perfect for special occasions like birthdays, holidays, or just hanging out with friends. It’s shiny and fun, making it great for celebrations. You can also wear it to school events, dances, or any time you want to add a bit of sparkle to your day. Silver Nail Polish for All Seasons Metalic nail polish isn’t just for winter or holiday times. It’s versatile and can be worn all year round. In summer, it looks great with bright colors. In winter, it matches perfectly with cozy outfits. No matter the season, silver polish adds a bit of magic to your nails. How to Remove Silver Nail Polish Easily Removing silver nail polish is simple. Just use a cotton ball soaked in nail polish remover. Press it on your nail for a few seconds and wipe off. If there’s glitter, you might need to rub a little more, but it comes off quickly without much hassle.   FAQs About Silver Nail Polish Q1: Is silver nail polish safe for kids? Yes, most silver colour nail polish are made without harmful chemicals, making them safe for kids. Look for polishes labeled as non-toxic to be sure. Q2: Can I mix silver nail polish with other colors? Absolutely! Silver goes well with many colors. You can use it with blue, pink, or even black for a cool look. Q3: How long does metalic nail polish last? With a good top coat, silver nail polish can last about a week without chipping. If you’re careful with your hands, it might last even longer! Q4: Can I use emerald green nail polish on my toenails? Yes, silver nail polish looks great on toes too! It’s a fun way to add sparkle to your feet, especially

Scroll to Top